‘Tis a both joyous and woeful time. I now have access to a beautiful dark sky site – the Dark Sky Viewing Area located just north of Tamworth, Ontario. It’s a purpose-built astronomical observing area and the southern most site in Ontario devoid of light pollution. Or nearly. Long exposure photography of the southern horizon will show some glow from cities, but in all other directions, the sky is as pristine as can be. Other than the infestation of mosquitoes, this is about as ideal a location as anyone could expect to view or image the night sky.
For anyone in Eastern Ontario interested in checking out this site, you can view their web site here: http://www.lennox-addington.on.ca/must-see/dark-sky-viewing-area.html or check out their Facebook page: https://www.facebook.com/DarkSkyViewing. Trust me, if you’re serious about observing or imaging and live within a couple of hours drive from here, it’s totally worth it. Weather permitting, you won’t be disappointed. Just bring the strongest mosquito repellent you can find if coming in the summer months!
The woeful part is that the azimuth motor on my 8″ Meade LX90 died and the scope is off for repair. So that means I’m left with only a short tube, 120mm refractor for imaging for the next couple of months. Definitely not ideal for deep sky imaging. But I’m not deterred! I’ll use it till I get my main scope back! It’s the equivalent of a 510mm f/5 lens, so it provides me with pretty decent magnification. Other for some chromatic abberation on bright stars (particularly blue stars), images are pretty sharp with decent resolution.
On Sat, June 28, I headed out with my friend Kevin – my regular partner in crime when it comes to astronomy – to see what we could image. As Kevin didn’t have a good scope, we’d normally just work together. He seems to have a better hand and eye when it comes to focusing shots than I do, so I generally line up and find the object, he does the focusing, then I get my intervalometer and we stand around chatting while the camera does its work.
This time around, we decided to coordinate our efforts on different objects to maximize our time out there. With the scope, I focused on deep sky objects (DSO), and he focused on shots of the Milky Way using his Nikon D60 with both his 50mm and my 35mm prime lens mounted on my iOptron SkyTracker. We came up with a plan to create a mosaic of the Milky Way while I started searching (visually) for some DSOs to shoot.
The first object that I locked onto was M13 – The Hercules Cluster. I had seen this object a couple of times in the past. I had even tried to image it once last fall as it was setting. I managed to get 1 poorly focused 30 second exposure of it before it set behind some trees. So it was high time to try to get some good shots of it. So I locked on, got focus, and snapped off a series of 3 minute exposures at ISO 1000. The results were truly astounding. The number of stars visible, even in my small refractor, were astounding. The final image looks a bit flat compared to the resolution I get from my LX90, but I’m still quite pleased with the result.
Note the images in this blog have been shrunk down significantly to fit in this limited space. I would strongly recommend you click on the links below the images to see the full-sized version on my Flickr page.
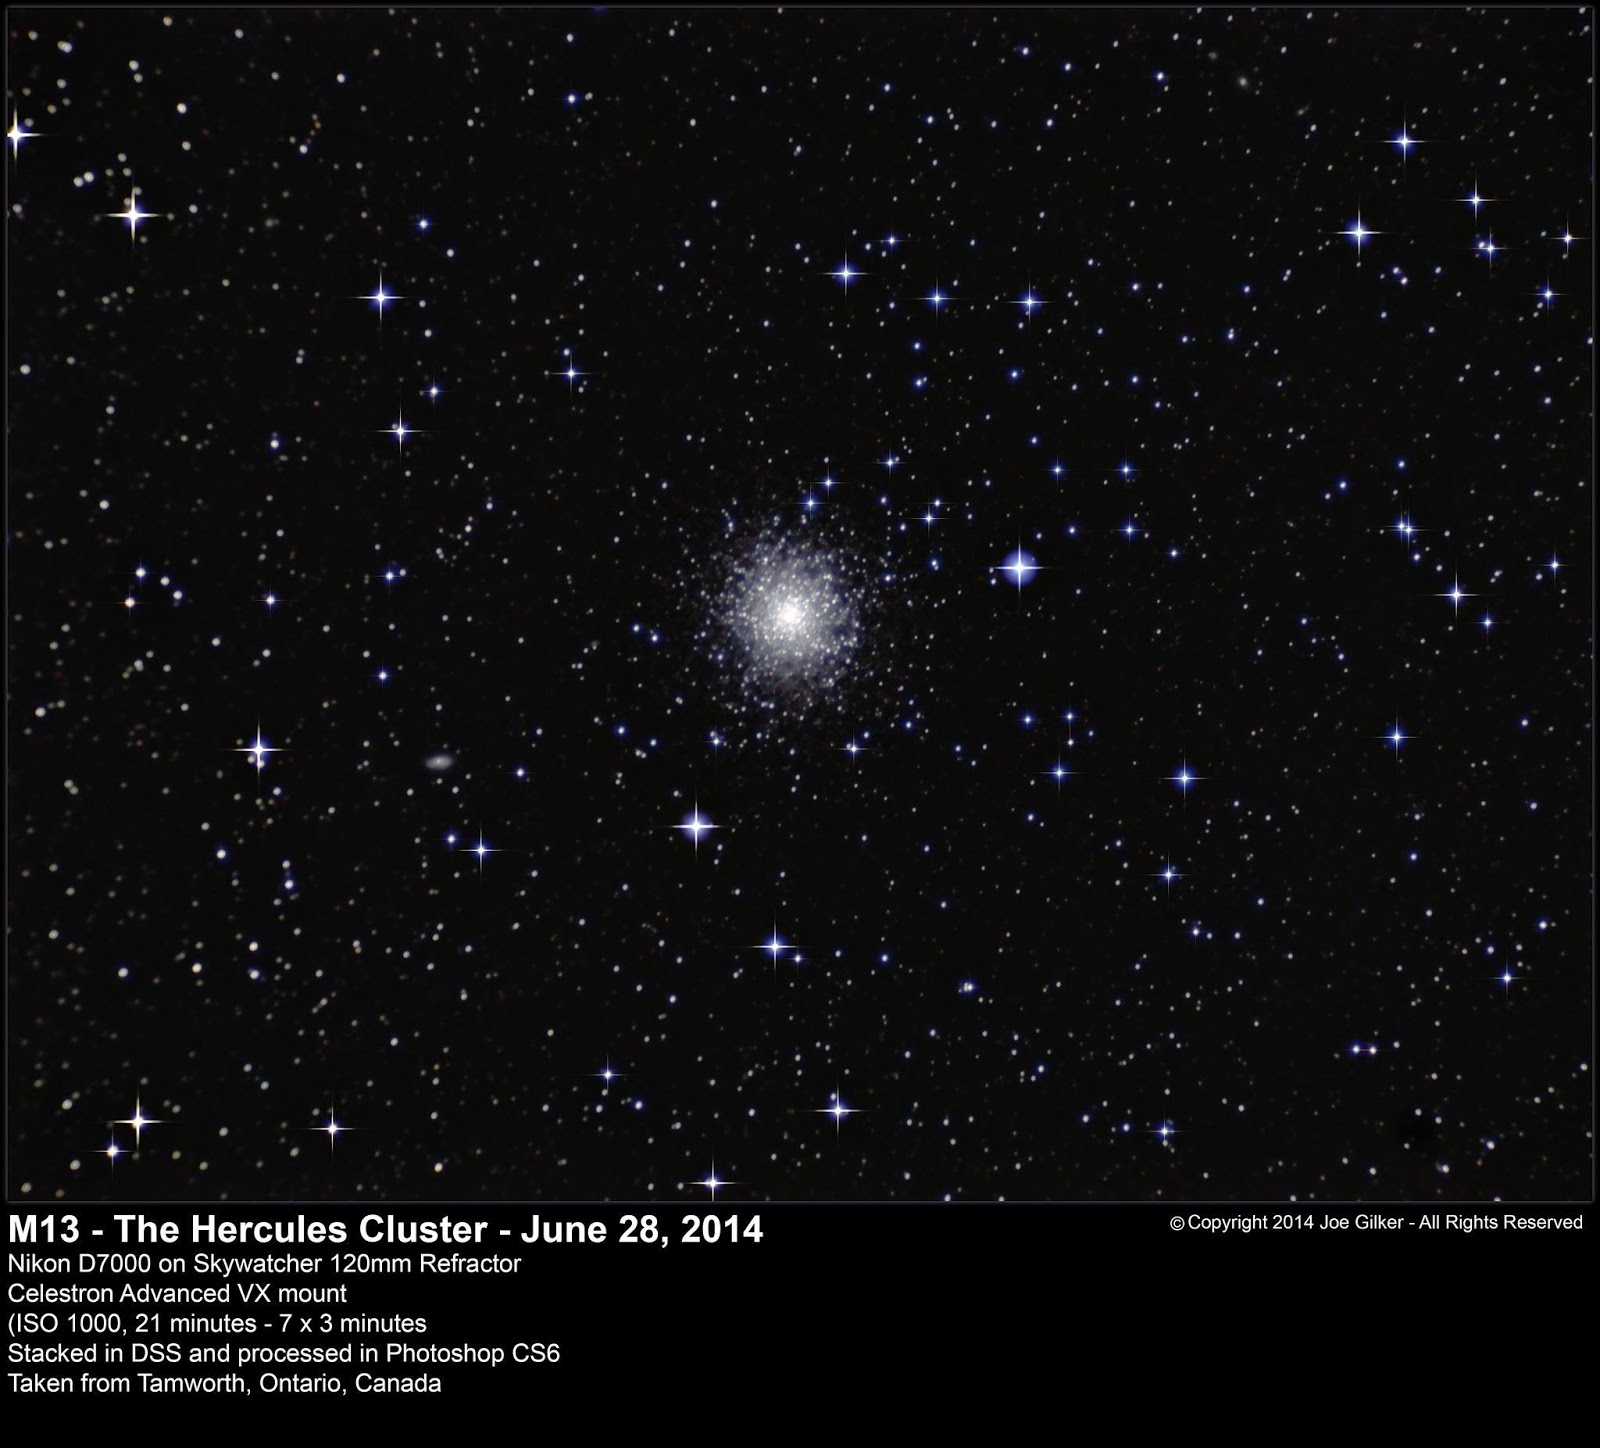
M13 – https://www.flickr.com/photos/crunchmeister/14556088593/in/set-72157637130862065/
The second target I locked onto was M16 – The Eagle Nebula. I’d tried to see this object before, but had limited success. I had tried years back using my 6″ reflector from my back yard. Finding it manually was quite a challenge, but the view from a light-polluted suburb was disappointing. It was just barely visible due to light pollution. When I finally got my 8″ LX90, I found it easily, but it was still barely visible. The visual appearance through my 120mm refractor was faint, but pleasing compared to past experiences. But imagine it brought out a lot of detail I hadn’t seen before. Even with fairly short amount of time spent on it (21 mins of exposures in the final image), the details that came out was beautiful, not to mention the rich star field that it sits in. This is a target I’ll most definitely be focusing on again in the future to add data to this image!

The final deep sky target of the evening was one of my favourites – M31, the Andromeda Galaxy. I had some mixed results with it through last summer. I finally managed to get 1 really good shot of it with just my camera, 300mm lens and SkyTracker. This time around, I managed to get some good data, although limited in time. As it turns out, I have just the right magnification with my refractor and camera to get M31 perfectly in frame! It was still fairly low on the horizon, so many of the shots I took were blurred by the atmosphere, but out of the 1+ hour of data I collected, 39 minutes of it were usable to produce this final image. It still lacks some colour and detail compared to what I COULD get, but overall, I’m very pleased with how this image turned out.

And last, but not least, we have to get to some of Kevin’s images of the Milky Way. First, we have this 3 frame panorama of the the core of the Milky Way. This provided a rich view of the core.

Next is this behemoth of an image. This is a 13 frame mosaic of the full band of the Milky Way stitched together with Autopano Giga and some post processing in Photoshop for histogram stretching and colour correction. It’s a huge image. I would strongly recommend that people view the original on my Flickr page, download the full-size image, and zoom in on it. You won’t be disappointed! The original was over 150MB in side and 17k pixels wide. I’ve reduced it to 40% of its original size to make it more manageable.

And as a side note, on Sunday, Kevin finally bought himself a good telescope. He’s now the proud owner of a previously enjoyed 8″ Celestron NexStar SE complete with an equatorial wedge. So we’re now going to be able to image DSOs once again while I wait for my scope to come back from service. Congratulations on your new window to the universe, Kevin. I was glad to be of assistance to you in getting this fine instrument.
Until next time, clear skies to all.


