Introduction
At the time of writing this, it’s been roughly 3 months since I’ve made the switch from a DSLR to a cooled CMOS astro camera. It’s been an interesting experience and hasn’t been without its challenges, but it’s been a very rewarding experience that I don’t regret in the slightest. Along the way, a lot of mistakes were made, but a lot was learned as well. Read on to follow along on my journey to my next step in astrophotography.
Prologue
For the past couple of years, I’d been considering getting a cooled CCD or CMOS camera for imaging, but had been putting off this rather significant expense. By the end of last fall, I was capturing the best photos I’d taken to date, but there was something missing. I realized that I was making remarkable improvement with my images of galaxies, but I seemed to have plateaued when shooting nebulae. I was reshooting targets I had previously visited and not seeing any significant improvement in my photos. I just wasn’t able to capture the detailed nebulosity I wanted, even with significantly longer exposure time.
Of course, the limitation I was facing was that DSLRs are just not sensitive to the deep reds due to their filters. Bare DSLR sensors are typically sensitive to a large swath of the electromagnetic spectrum but have a band pass filter over the sensor will only allow the visible light spectrum of 400- 700 nanometers (nm) to reach the sensor. The UV end of the spectrum is cut off sharply at 400 nm, but the cut off in the red region is less extreme, starting at about 625 nm and more gradually tapering off to the final cut off at 700 nm. The important range for photographing nebulae is a narrow window centered on the 656.28 nm frequency, where the H-alpha emissions that make up the majority of emission nebulae are present. These frequencies are mostly blocked by the IR filter on cameras designed for “terrestrial” use. It takes a LOT of integration time with an unmodified DSLR to capture even the smallest traces of these deep reds, as only a very small percentage of this light actually reaches the sensor compared to the rest of the visible spectrum below 625 nm. I had considered having one of my DSLR bodies modified for full spectrum sensitivity and using a clip-in IR filter, but that would essentially “ruin” the camera for anything but astrophotography, and I’d still be struggling with the noise generated by heat in the sensor on warm nights. A dedicated astro-camera was really the only feasible solution.
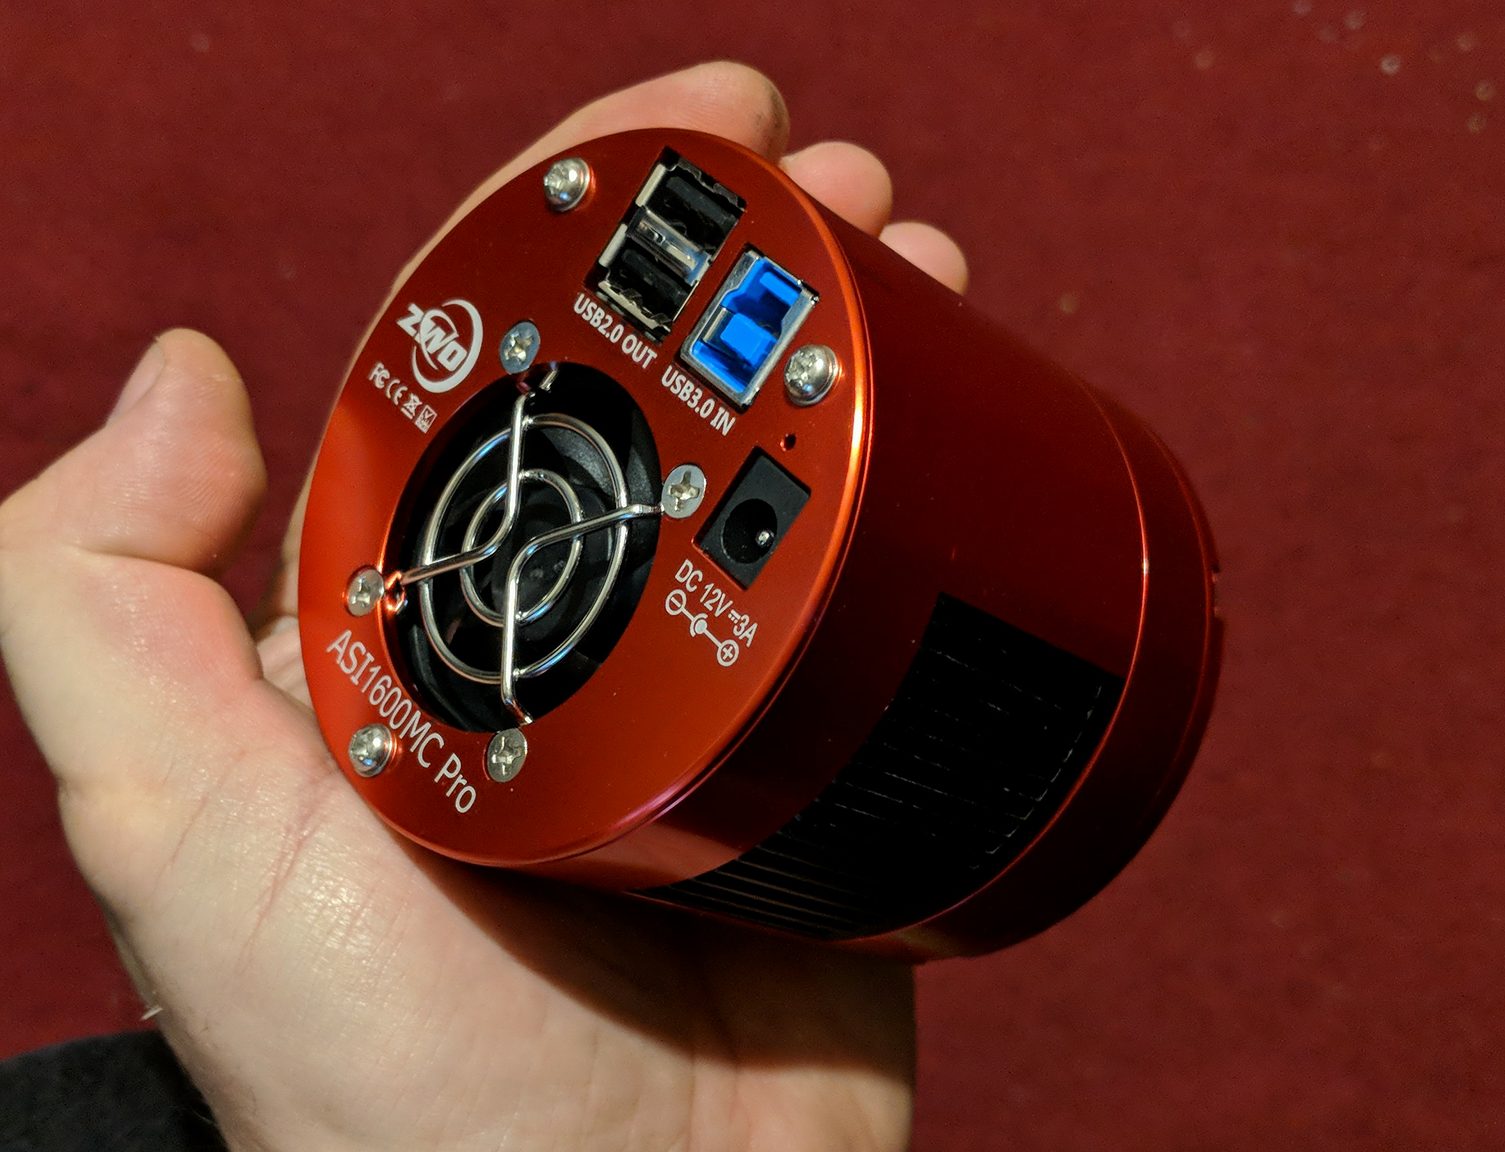
I spent several weeks researching all the cameras in my price range , reading reviews, specs, and looking at results people have had with different cameras. After much deliberation and considering the pros and cons of different brands and models, I decided go for a colour camera. My final choice was the ZWO ASI1600MC Pro which was suitable for both deep space and solar system imaging. With a 4/3 format, 16 megapixel sensor, it was going to give me roughly the same resolution as my Nikon D5100 I had been using until that point. The slightly smaller chip meant narrower fields of view, but a higher pixel density and finer detail as a tradeoff. And best of all, this camera can be cooled to up to -45ºC below ambient. This means that in my climate, I can consistently shoot at -20ºC, eliminating the noise issues that previously plagued me on hot summer nights.
Finally the day came when I pulled the trigger. I ordered the camera from Ontario Telescope, and it arrived just in time for the weekend! I had already planned to go out to the North Frontenac Township Dark Sky Preserve that weekend and the weather looked good, so I was set! Nothing could stop me now, right? RIGHT?
Yeah, no so fast.
Reality Strikes Back
I expected using this camera would be similar to using my DSLR with BackyardNikon on my laptop, but with different software. My friend Tim Trentadue (a fantastic astrophotographer check out his Flickr gallery!) had recently made the switch to an ASI1600MM camera with filter wheels, which is basically the same camera, only monochrome. He suggested that Sequence Generator Pro (SGP) would be the best option for software instead of using SharpCap as I had originally intended. I trust his expert advice, so I downloaded the trial version (which I’ve since purchased) and installed it. I watched a few “how-to” videos on YouTube on how to configure my software, set up my mount for ASCOM control and guiding (I had been controlling via my handset and guiding via my ST-4 port until then), and general operation. I set everything up in my basement to ensure I had my connections working, and simulated some imaging. I loved the level of automation that was in SGP. This was a tool I would seriously have to grow into.
I should have expected issues and did to an extent. But I went out feeling very optimistic that I had at least partially overcome my challenges. Once out in the field for the first time, I realized that what I THOUGHT I understood in a simulation setting was very different in the practical application. I was sorely unprepared and made a lot of mistakes. I had alignment issues. I had guiding issues. I had focus issues. I bumped my mount forcing me to have to go through my entire polar and scope alignment routine again. In the end, I left with a few bad shots of M13, but I had learned a lot, so it wasn’t a wasted evening.
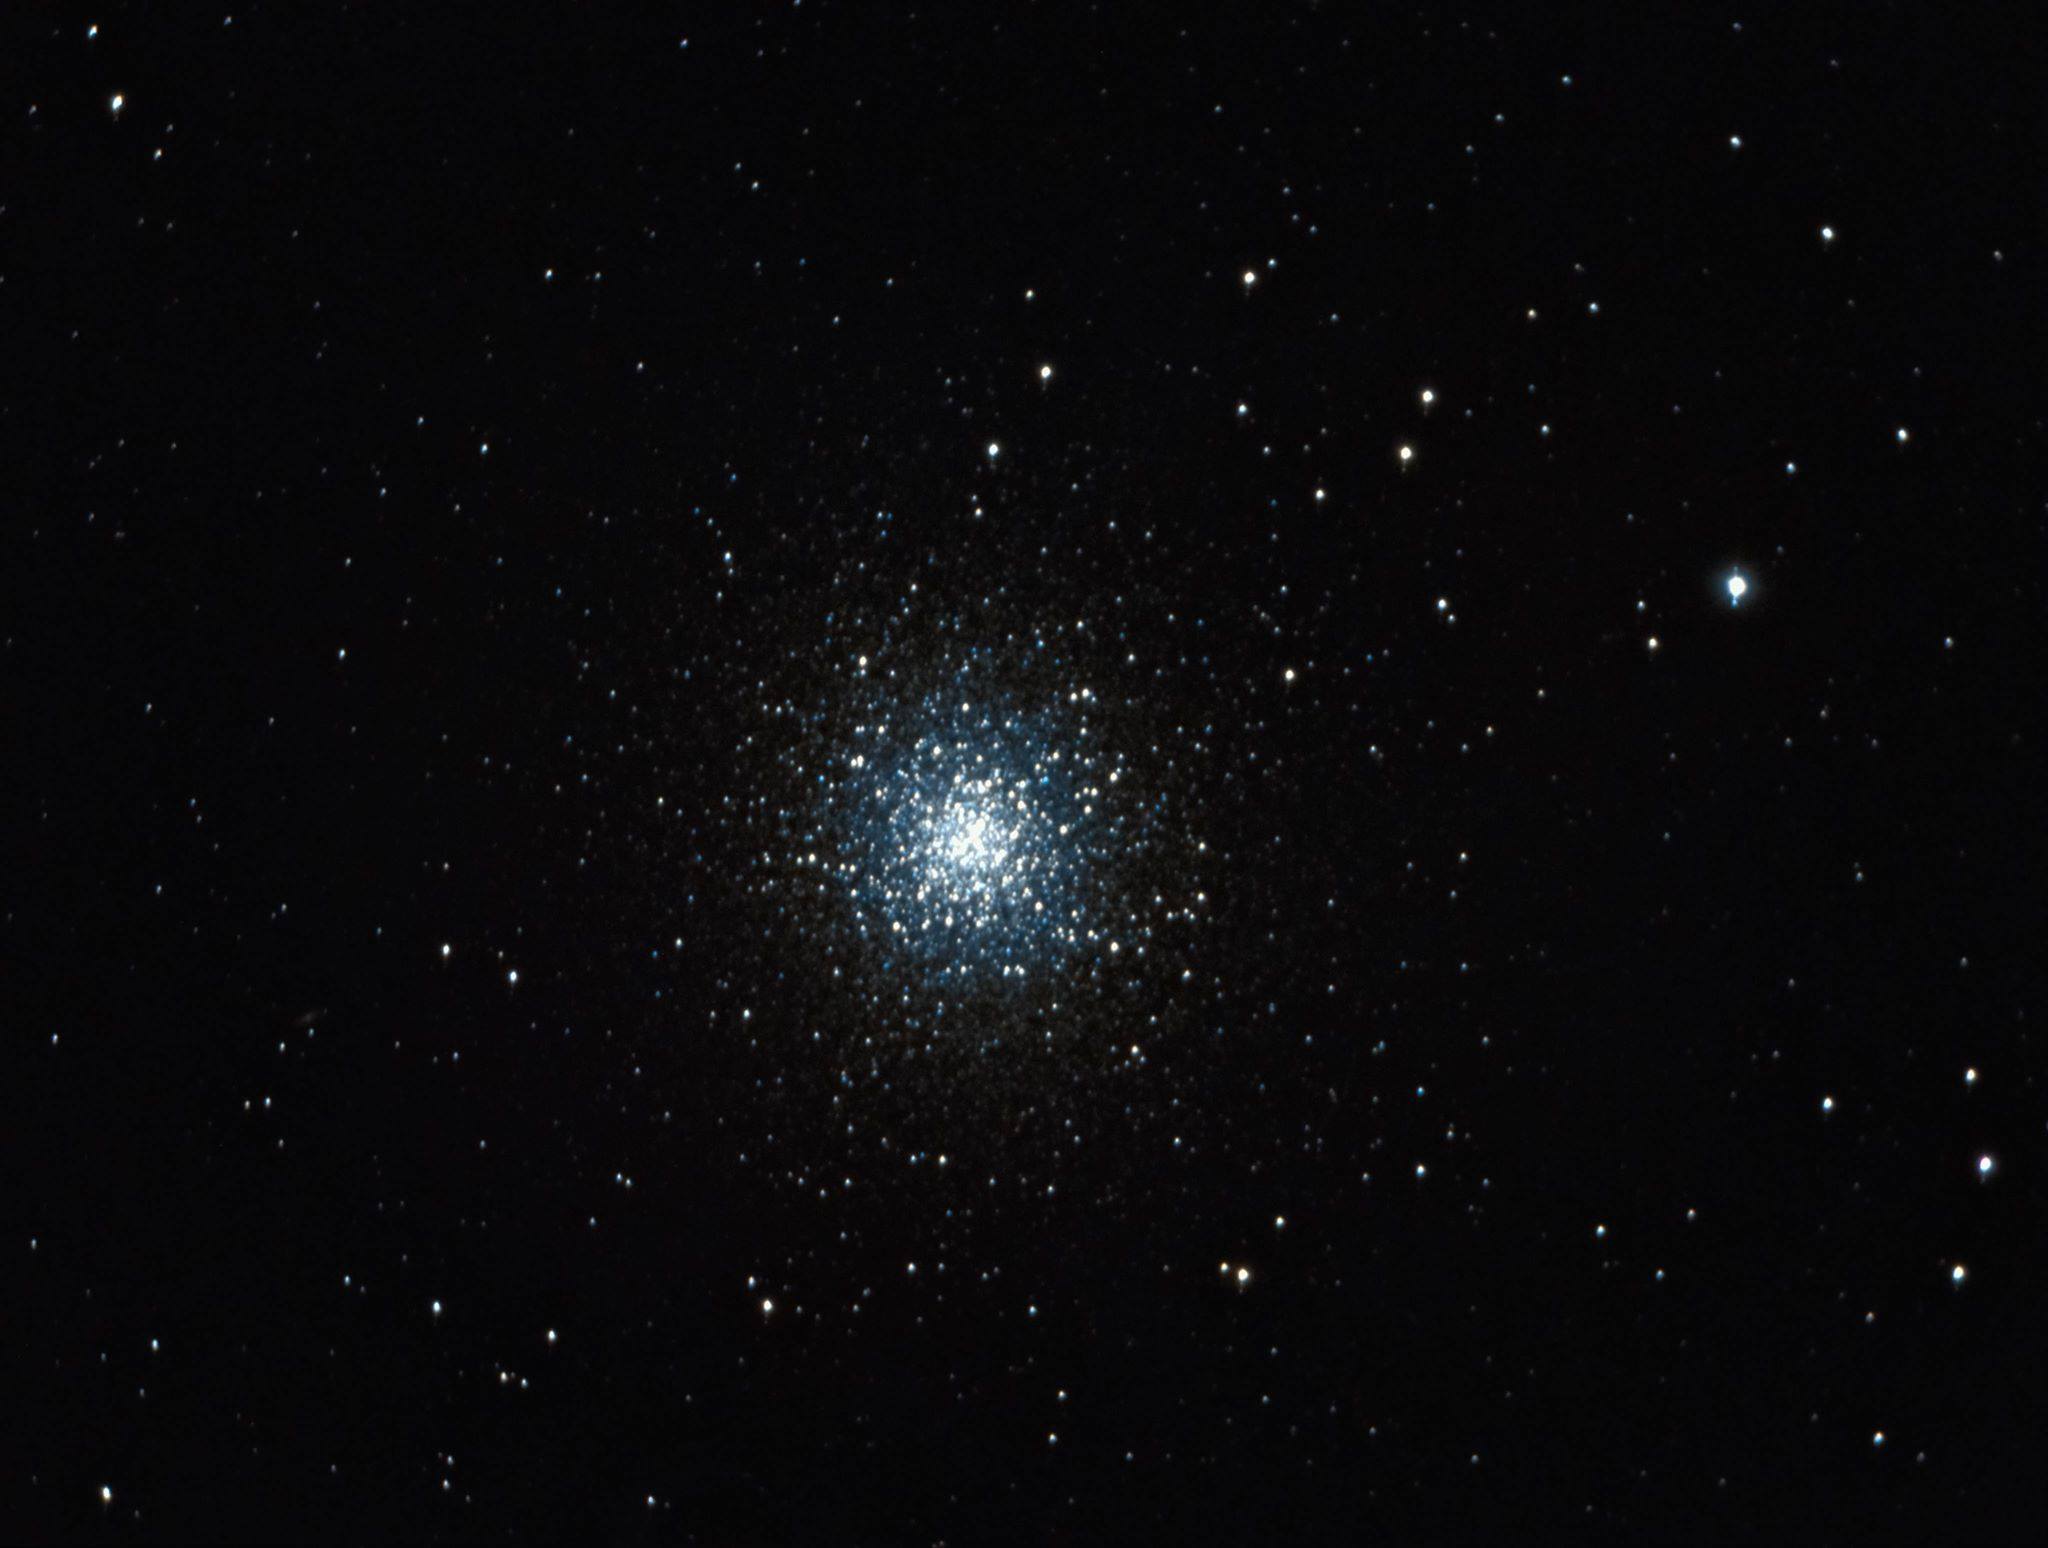
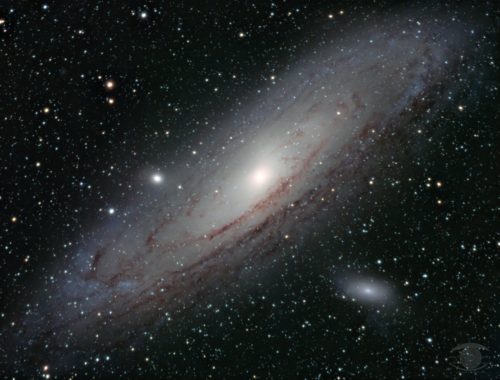
Over the next few cloudy days, I hit YouTube and astronomy forums, watching videos and reading peoples’ questions and answers. I soaked in all the information that I could. It felt like I was drinking from a fire hose, but I wanted to learn everything I could. My second session was only marginally more successful in terms of final results, but it was a huge step forward in terms of learning. My focus issues were gone thanks to a Bhatinov mask my good friend Kevin had 3D printed for me. Setup was smoother than the last time, although it took me a while to figure out how to correctly use both the SharpCap polar alignment tool and SGP’s plate solving to align my mount. I managed to a few get more images of M13, but nothing impressive. A test image of M31 turned out pretty good. Not great, but not terrible either. There was progress and I was on the right track. I knew what mistakes I was making and how to correct them. I knew that the next time out, I would get better results.

I managed to get out again the following night and I was right. Setup was a snap. Polar alignment was quick and painless, and plate solving in SGP for alignment was done in seconds. I had my system up and ready to image in record time. Normally, polar alignment and mount alignment alone would be a 15+ minute job assuming I got it right the first time (which I don’t always). Using the new tools at hand, it was done in under 5 minutes and perfect. Now I was getting somewhere! Unfortunately the clouds had other plans for me, so I had to pack it in for the night before getting any data. Disappointing, but I was making progress.
Breakthrough
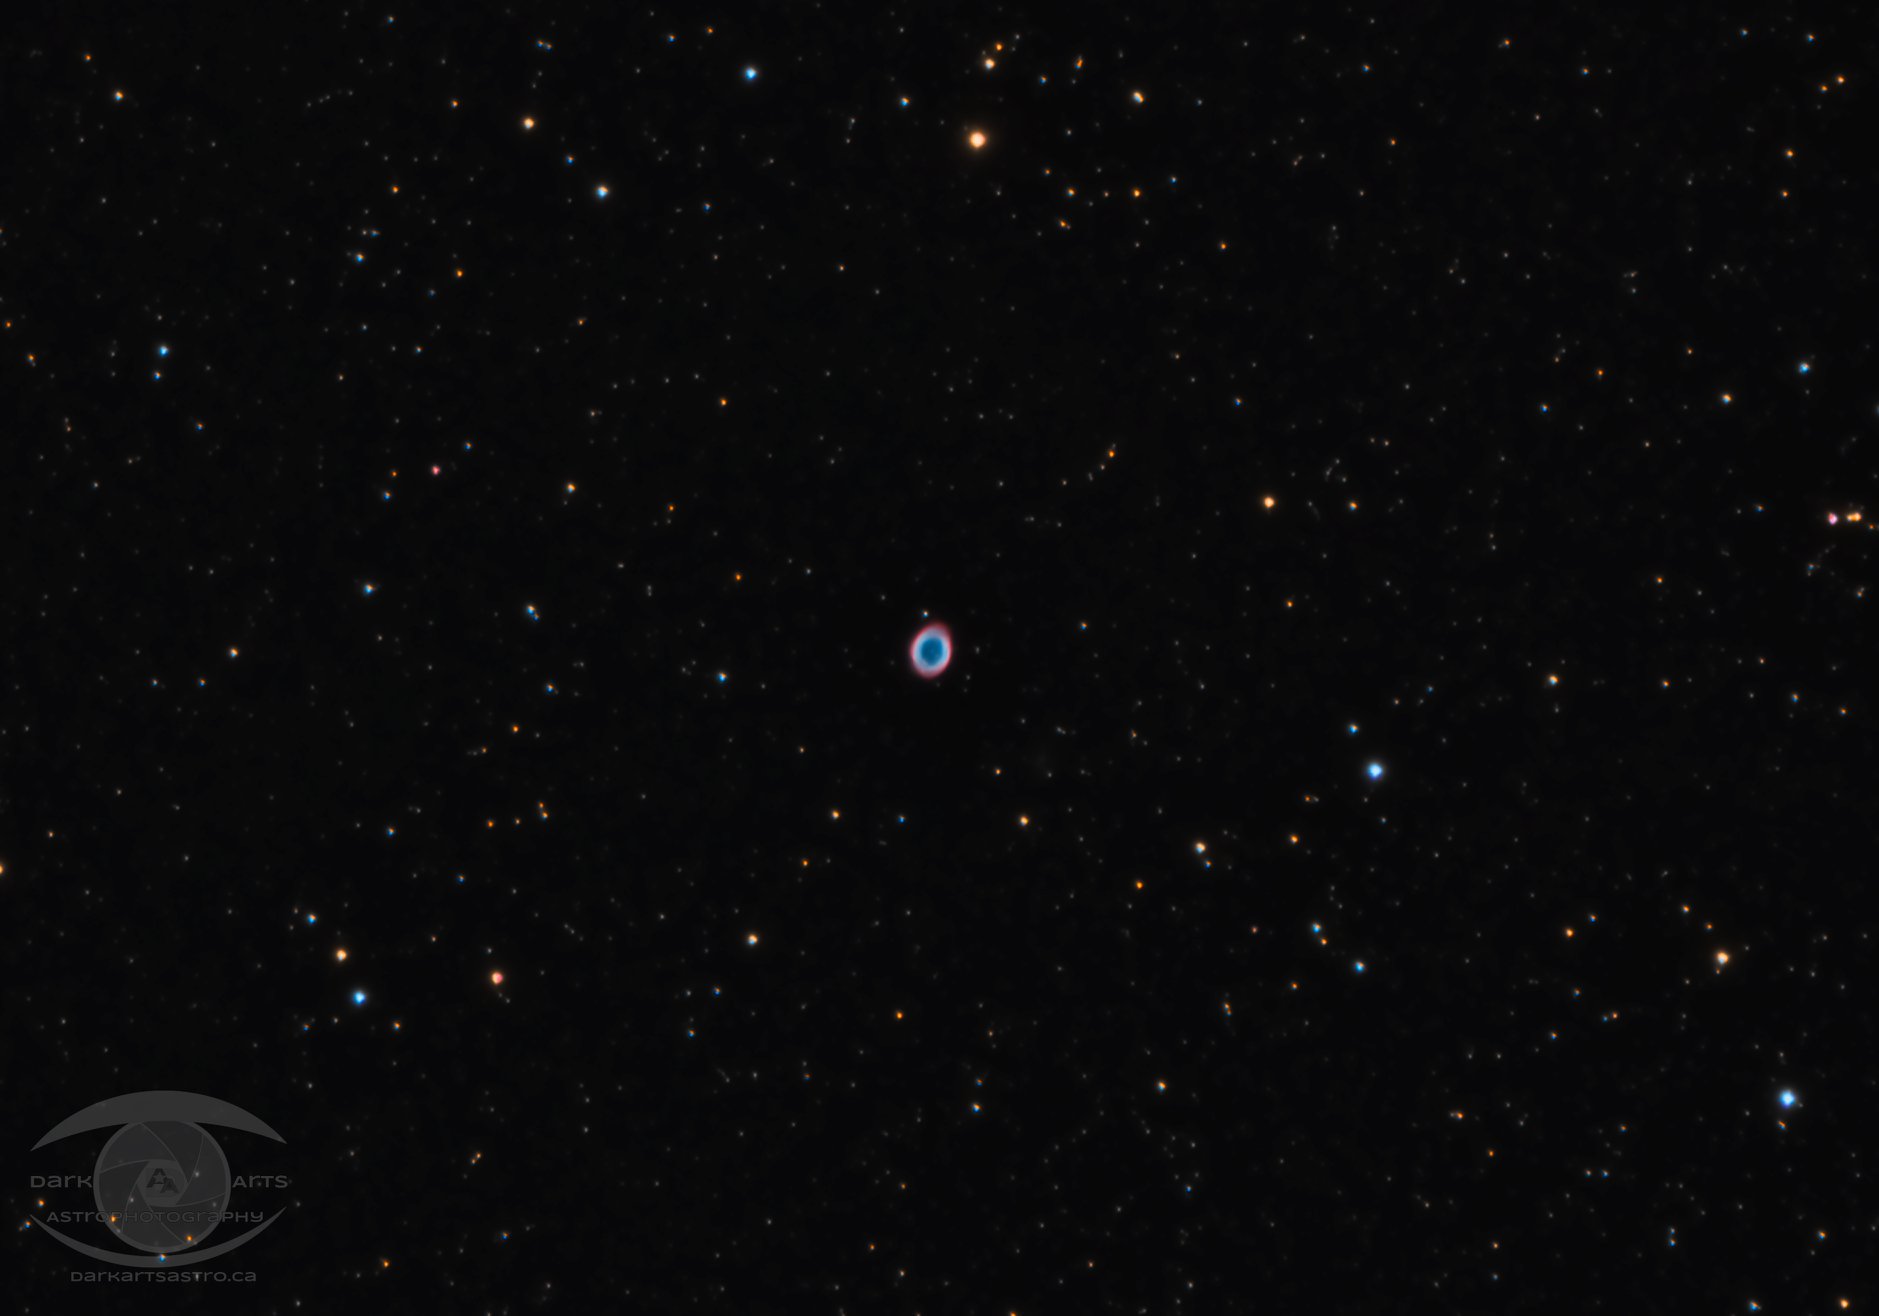
I had a week off from work in early July, so I took advantage of this to head out to the Lennox and Addington Dark Sky Viewing Area feeling far more confident in what I’d be able to achieve. Despite having owned the camera for 3 weeks and having been out a few times, I had no really good images yet. I had gotten some, but nothing that matched or exceeded what I could do with my DSLR. My chosen target was M57, the Ring Nebula. It was overhead making its location ideal, and I had often imaged it in the past, so was very familiar with it. I knew it would be tiny in my little ED80’s wide field of view, but it was still a familiar target to practice on. As my first few subs came in, I was seeing how sharp and crisp the images were. I knew I was finally getting good data and wasn’t going home empty handed.
After nearly 90 minutes, I decided to switch to something a little more challenging to test the camera’s sensitivity to deep reds. I slewed my scope to the Bubble Nebula. Through a combination of the moon rising and some thin high altitude cloud blowing through, the final image on this wasn’t very good, but I was now seeing detail in the reds that I had never been able to capture with my DSLR, so I was extremely pleased.

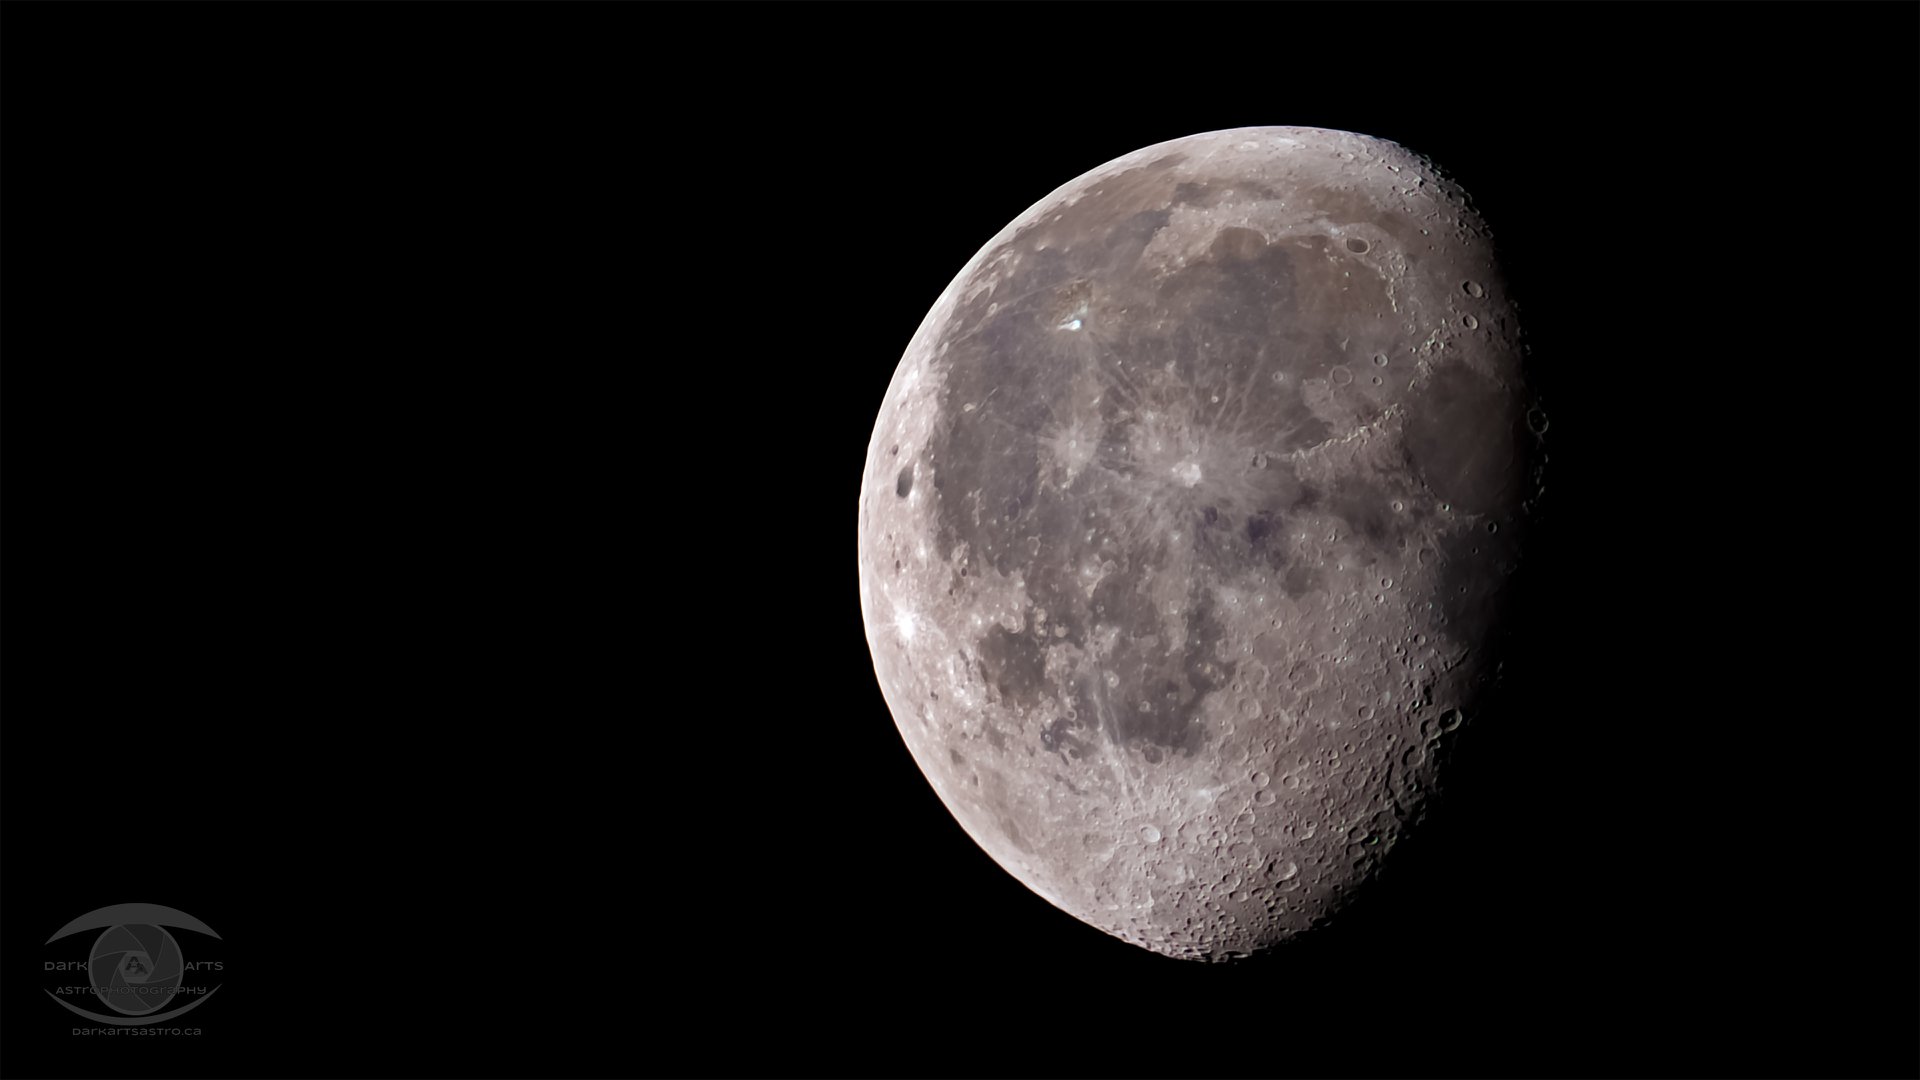
I stopped shooting the Bubble at this point since the moon was too bright and slewed to the moon instead. I fired up SharpCap and grabbed a 5000 exposure video which produced one of the most detailed and colourful images of the full lunar disc I’ve ever shot. This camera was impressive!
Trimming the Fat
I had gotten over all the initial hurdles and I was now at a point where my new images were either matching or exceding what I’d done with my DSLR – except for one glaring issue. I was experiencing something I’d never had to deal with previously – star bloating. Despite having made some serious changes to my rig to balance it better and the fact that I was guiding more accurately than ever, my stars were all fatter than pics taken with my DSLR. I was only shooting 3 minute exposures with my new camera (due to its higher sensitivity) when I was shooting 5-10 minute shots with my DSLR. Yet, I had these fat stars I couldn’t explain. Something wasn’t right and I had to figure this out.
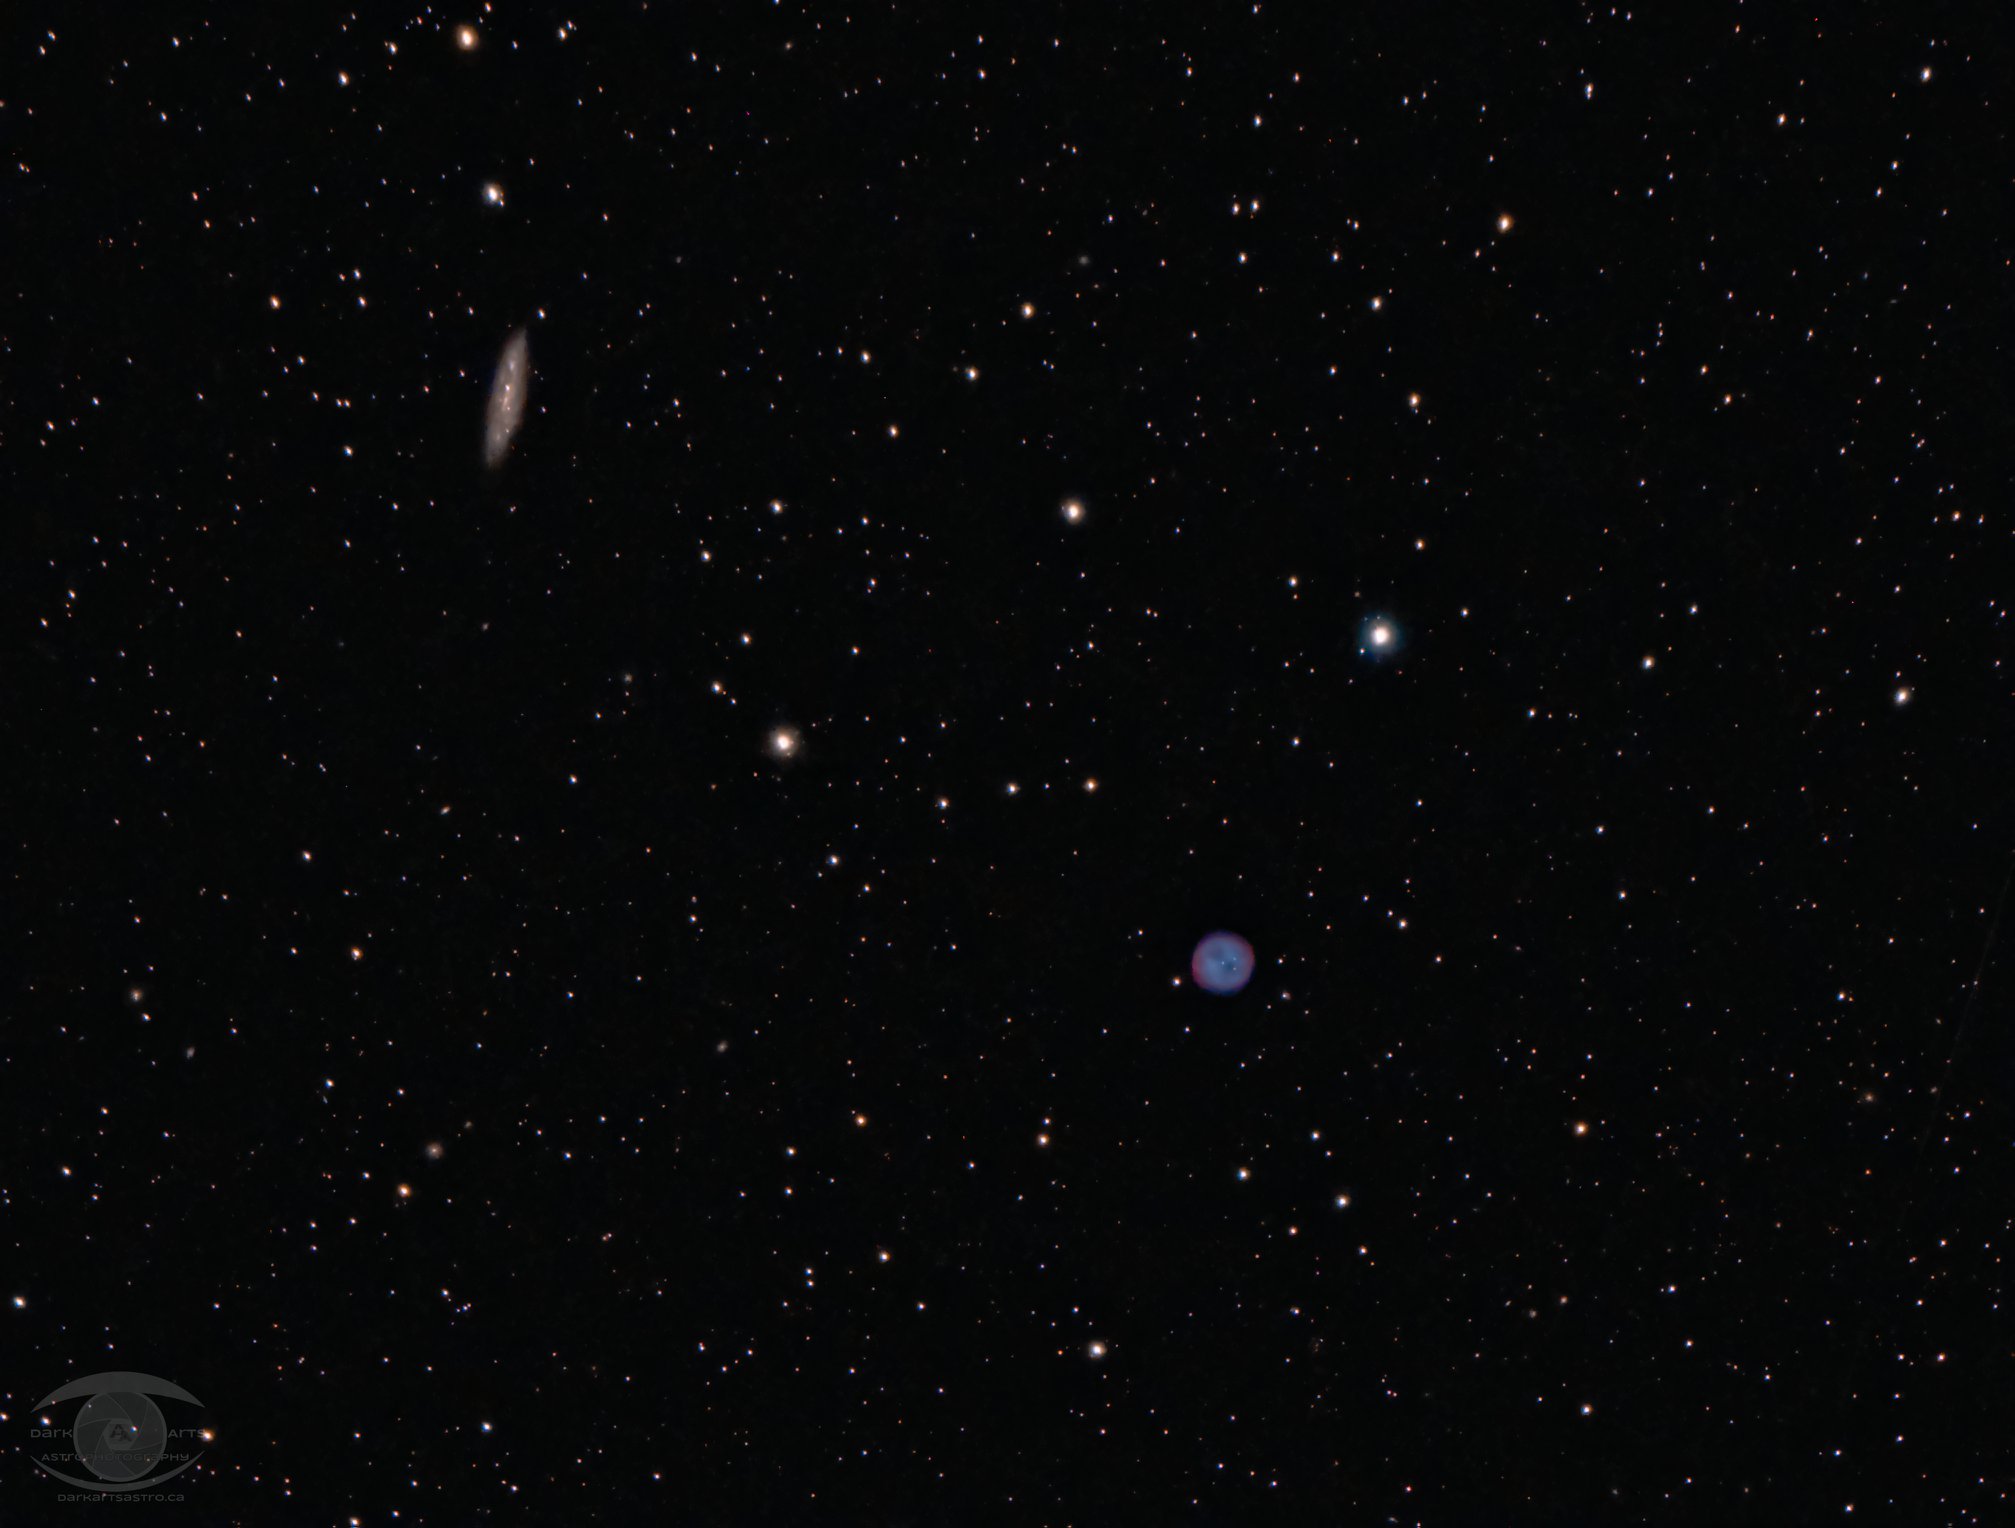
After some research and asking many questions online, it was suggested that I needed an IR filter to fix this issue. I didn’t understand the reason for this at first, but researched further and found my answer. What I hadn’t considered is just how much light some stars emit in the IR, which my new camera picks up very well. What I was seeing were stars that were normally faint since they emitted much of their light in IR, which my DSLR was blind to. With the new camera, they were being picked up as large, bright sources of IR light, hence the bloat. And of course, since all stars emit IR radiation, all my stars were suffering from this bloat. The solution to this was to purchase an IR cut filter. It was suggested that I get a Baader UV/IR cut filter, which I did, and it fixed my bloating problem. My first time out with the filter, I got a fantastic shot of the Owl Nebula, and the stars are now pinpoints as they should be! This field of view was getting pretty low, so there’s a bit of fuzziness on the bright stars due to atmospheric haze, but overall, the stars were very sharp and looked far better than any previous images I’d shot with this camera.
Post Processing
Another challenge associated with this new camera that I had never anticipated was post processing. In the past, I stacked my images using DeepSkyStacker or a combination of Lightroom and Photoshop (as seen in this tutorial). The LR / PS route I’d been using regularly for the last year didn’t work since neither program could debayer the FITS files produced by this camera. After watching some processing videos by Sara Wagar, I figured I’d give give Astro Pixel Processor a try for my stacking needs. She’s an amazing astrophotographer who produces incredible images. I figured if this was her software of choice, there had to be something to it. I download the trial version and I was NOT disappointed in the results produced. There was definitely a learning curve attached to it, and it wasn’t free like DSS, but I think the results were worth it. I was finally producing some excellent images. I ponied up the price of admission well before my trial period had expired.
One key thing I’ve now noticed is that many of my images require a lot LESS work in Photoshop than they did before. Images of galaxies are about the same in terms of processing and selective sharpening, but the low level of noise saves me a lot of processing steps and time. When it comes to nebulae, I no longer spend long periods of time trying to coax out subtle detail in the nebulae while mitigating noise. That detail is now front and centre and the low noise floor is very easy to deal with by comparison.
Final Results
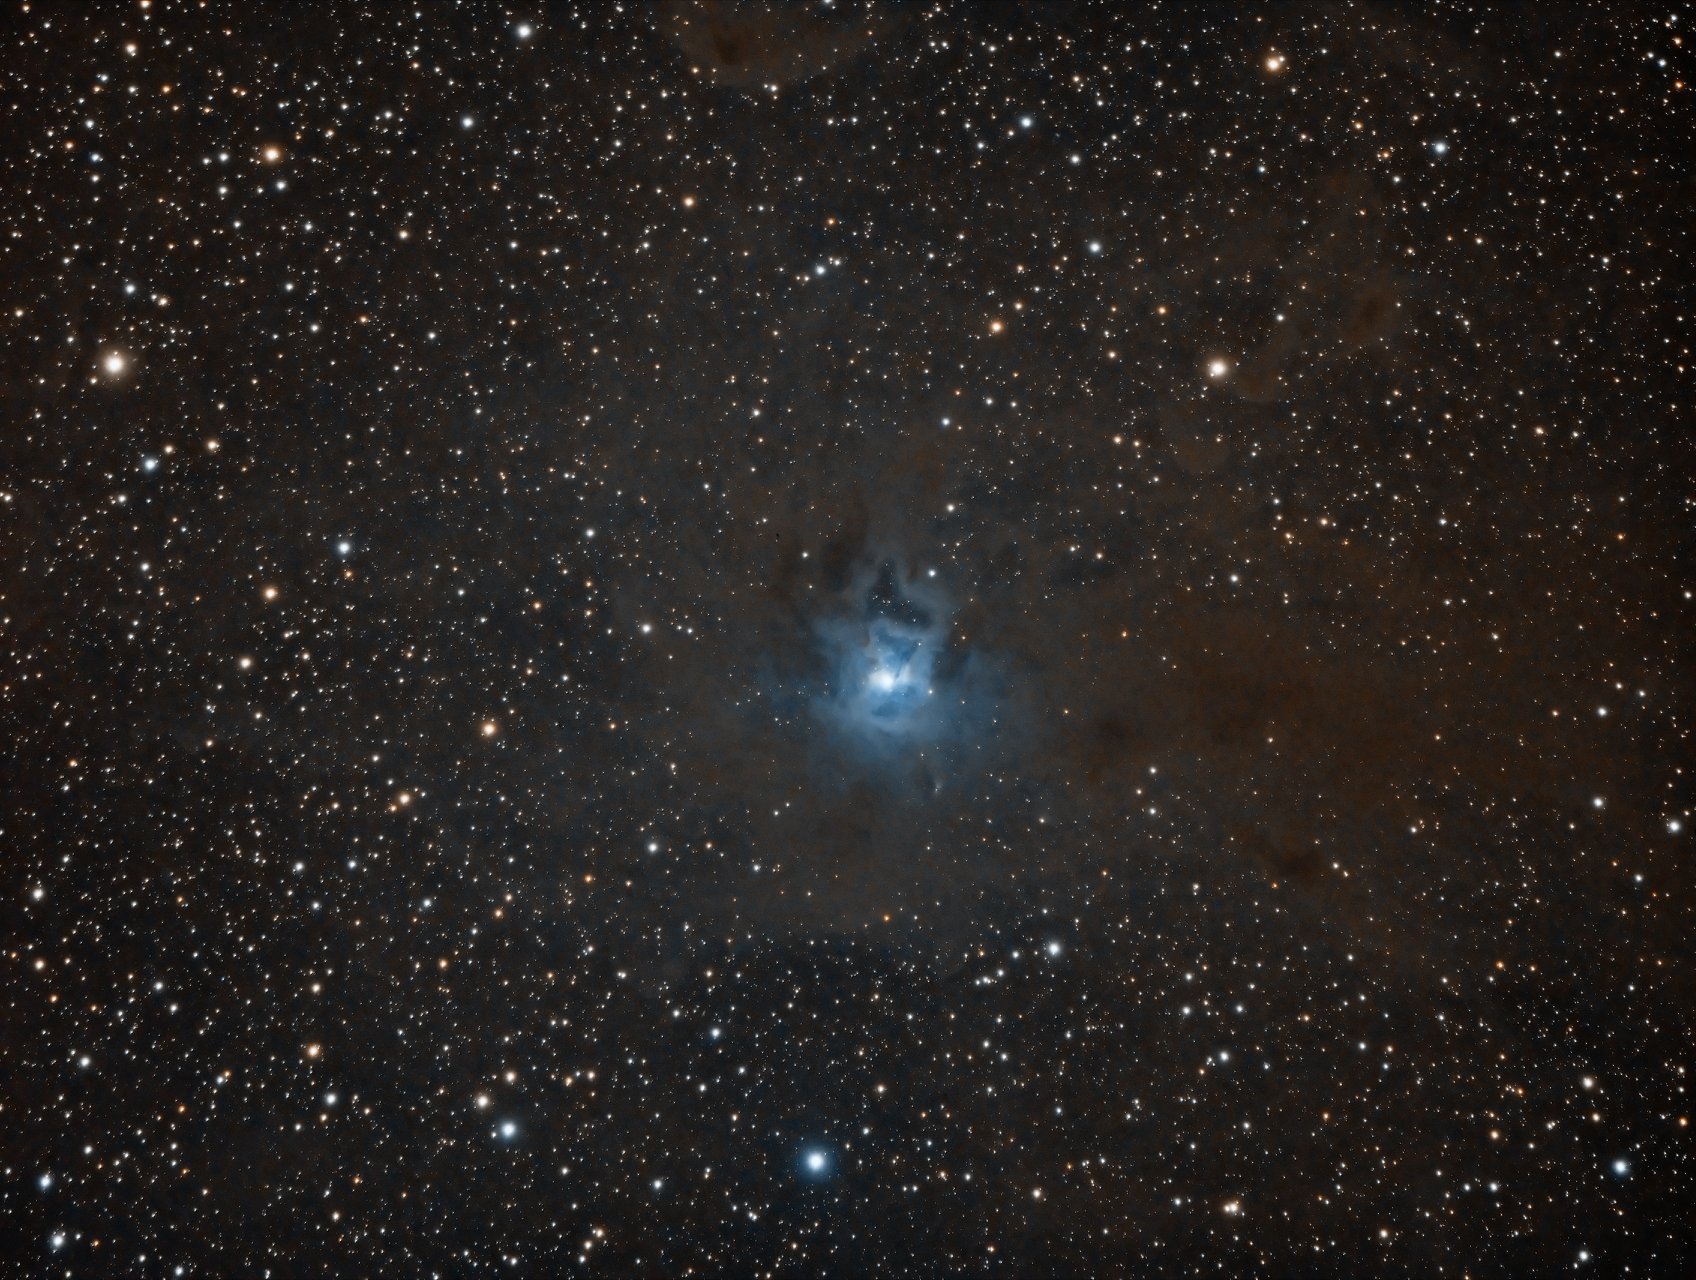
And nowhere is that sensitivity to faint detail more apparent than in a couple of images I shot last weekend. I aimed at the Iris Nebula for the first time. It’s been on my “to shoot” list for a while, but I hadn’t yet gotten around to it. I knew it would be a more difficult target due to the dark dust and gasses surrounding it. So it was time to see what this camera could do. And I’m thrilled to say it looks even better than I thought it would.
I really should have shot the Iris for longer, but an old friend – Orion – decided to make an appearance and distracted me. Orion’s belt had risen over the tree line and was beckoning to me. The Horsehead Nebula is a target I’ve struggled with over the years. I’ve gotten some acceptable photos of it, but despite long integrations, I’d always struggled to bring out fine detail and faint nebulosity. I’ve always found my images to be lacking in detail compared to other images of it I’d seen. I knew sunlight would me making an appearance in the next hour and I’d have to pack up, so instead of getting another hour of data on the Iris, I decided to switch targets and see what this camera could really do on faint H-alpha emissions. Despite the Horsehead and Flame being in a less than ideal position for photographing, the results were astounding. The image I got in only 1 hour of integration time surpassed all my previous attempts and far surpassed my expectations. Now I’m waiting until it’s in a better position in the sky so I can take my REAL picture of it with multiple hours of integration time. Perhaps I’ll even shoot a mosaic of the entire region!

In any case, I find myself extremely pleased with the way my recent images are turning out now that I’ve gotten over that initial hump with my conversion. I know I’m on the right path, and it only gets better from here.
Lessons Learned
When I got this new camera, I thought it would be a fairly painless transition. It turns out I was very wrong on many of my initial assumptions. I expected a learning curve, but I was unprepared to encounter one this steep. On the plus side, powerful tools like SharpCap’s polar alignment tool and SGP’s plate solving have been a huge blessing that take long, tedious processes and turn them into quick, simple affairs and removes any guesswork or estimation out of the process. This is a time saver, and it ensures that my alignment and tracking are more accurate than they’ve ever been.
One thing I wasn’t wrong about is that this camera would allow me to take the “next step”, in my astrophotography journey. Indeed, my early results are showing that I’m on the right track and I’m capturing nebular emissions that had previously been invisible to my cameras. I’ve had to re-evaluate how I do things. My well-established processes I had developed over the previous 5 years have basically been tossed out the window and replaced with completely new ones (both in the field and in post). Despite that, I have no regrets, as I’m now preparing to explore the next level in imaging.
So is the upgrade to a cooled astro camera worth it? Absolutely. As Tim told me the other night, “no one has ever regretted buying a dedicated astro camera”. And he’s right. It may have briefly set me back due to the initial learning curve, but now I’m seeing results in my images that I was hoping for. And in some cases, my expectations have been exceeded. And this is just the beginning.
If you’re going to go down this path yourself, take your time and don’t be too hard on yourself. If you don’t succeed on your first few sessions, don’t be too concerned as that’s pretty much par for the course when going through such a drastic shift in terms of equipment and processes.
And one final point – if you get a one shot colour CMOS, be sure to budget in a good quality IR cut filter and get it along with the camera. You’ll need it. Results will be underwhelming without it.
So as always, until next time, keep those eyes and lenses pointed up!