Category: Uncategorized

The Super Moon Explained

Ok, it’s over. The super moon everyone’s been talking about for the last month has come and gone. However, I still hear questions about what exactly made this super moon special.  So I figured it would be a good idea to write this blog entry explaining it.  This will be old news to those in the know, but I’ll start with a very simple explanation of the celestial mechanics at work here for those that don’t understand.

The moon revolves around the Earth once every 27.3 days.  But it’s orbit isn’t perfectly circular. Because of the gravitational tug of the sun, it travels in a slightly elliptical orbit at an average distance of approximately 381 000 km. At its closest point (perigee), that distance is reduced to a ‘mere’ 357 000 km. At its farthest point (apogee), the moon is at 406 000 km. At it’s closest point, it’s about 50 000 km closer to the Earth than at apogee. So technically, there’s a “super moon” every month when the moon is at perigee, but it’s only considered to be a true super moon when perigee coincides with the full moon, resulting in a larger apparent size and significant increase in brightness. And that’s what just happened this month.Most people I’ve spoken to about this didn’t really notice a difference in size. To someone who doesn’t look at the moon a whole lot, this is quite understandable. The angular size of the moon only appeared 14% larger than normal, which isn’t really a noticeable difference. However, there was a 30% increase in brightness, and I think most people could easily notice that. I know I certainly did! I was out with my scope on the night before the full moon (97% full) and sky was very bright. And the shadows cast by the moon were far more pronounced than usual. There was no mistaking the added brightness!In the days leading up to the full moon, I was out a few times taking some images. The full moon is the worst time of month to take images of the moon. The lack of any shadows makes the surface look very bland and 2 dimensional, not to mention the high brightness wreaks havoc on cameras CCDs. But nonetheless, I was determined to get some images.

The first project I attempted was a mosaic of the moon on August 7. The moon was at 90% full and quite close to perigee. Using my Skywatcher 120ED refractor and my Celestron NexImage 5, I started systematically taking shots of the entire surface. 16 frames later, I had the entire surface covered. I later processed the images and stitched them together using Auto Pano Giga to produce this full mosaic of our celestial neighbor. For a full resolution view, I would strongly advise checking the link below the image so you can see the full size image on my Flickr page.

https://www.flickr.com/photos/crunchmeister/14862673035/in/set-72157637130862065

And of course, I couldn’t let the supermoon get by without getting a single, full frame shot as well on the day of the full moon. This one was done using my Skywatcher 120ED and my Nikon D7000 DSLR. It’s not a big image since my little f/5 refractor is really intended for wide angle photography, but the results were still quite pleasing overall.

https://www.flickr.com/photos/crunchmeister/14869662316/

So now that the pesky moon is starting to leave our evening sky once again, I’ll be following up with some more deep sky imaging in the coming weeks. My 8″ Meade LX90 has been out for repair all summer due to a motor failure. It’s been shipped back to me and I should be receiving it in the next couple of days. Happy times will be here again!Until next time, clear skies.

Stars of the Show Deserve a Cigar

Friday, the night was humid and hazy and the seeing was terrible. But with beers in hand, Kevin braved the mosquitoes and set up our scopes in his back yard to make an evening of astrophotography. Thin clouds were blowing through and the atmosphere was very turbulent. I didn’t really expect a great result, but Kevin wanted to test his new scope and I was determined to get some pics after failing to get anything useful our previous time out.

Everywhere I look, I see stunning photos of galaxies, clusters, and nebulae. Occasionally, you get a constellation image and stunning widefield images of the Milky Way. Most of the time, it’s pictures of the ethereal beauty of deep space objects. Honestly, I can see the appeal. I mean, what photographer wouldn’t want to capture such exquisite beauty, right? And I’m as guilty as the next person for doing so.

This time, I thought I would do something a bit different and try photographing a star instead. Under the sky conditions at the time, it seemed like it would be the only thing I could get a decent image of anyway. And when you can photograph 1, why not get 2 in the form of a double star? So I chose the Mizar / Alcor pair, since it’s just too obvious and a usually overlooked target.

According to the Wikipedia article: “Mizar (Zeta Ursae Majoris, Zeta UMa, ζ Ursae Majoris, ζ UMa) in Arabic known as “سها” is a quadruple system of two binary stars in the constellation Ursa Major and is the second star from the end of the Big Dipper’s handle. Its apparent magnitude is 2.23 and its spectral class is A1V. Mizar’s name comes from the Arabic مئزر mīzar, meaning a waistband or girdle.“This is a beautiful pair that can be seen with the naked eye by people with average eyesight. Most never notice that it’s a multiple star until it’s pointed out to them, but once they know, they can easily see it. Through binoculars or a telescope, the separation of the 2 is very apparent. And it’s a nice sight to see.

Mizar and Alcorhttps://www.flickr.com/photos/crunchmeister/14505980869/in/photostream/
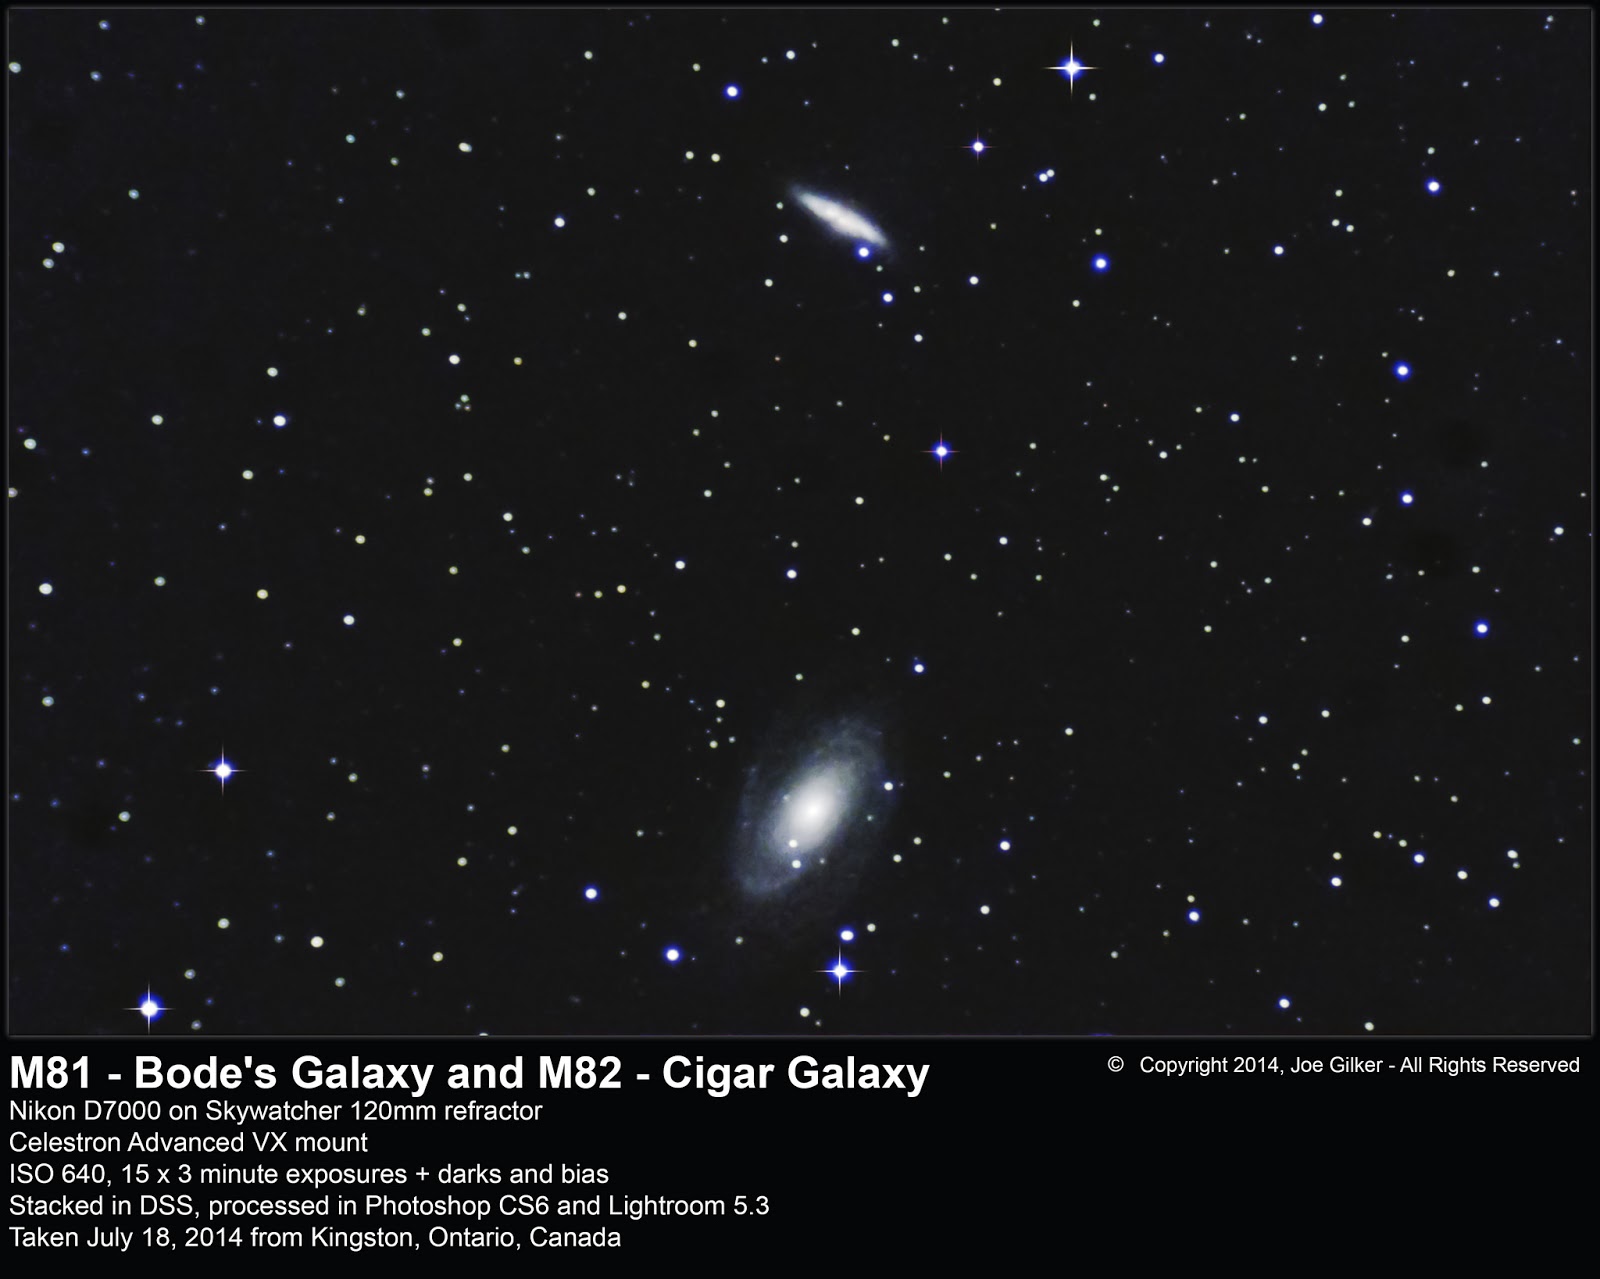
And suddenly, the sky cleared up of clouds. It was still terribly humid and the seeing was poor, but I figured I’d try a shot at some deep space goodness. Since I was into shooting doubles, I thought I would swing the scope southeast 20º or so and try to catch the deep space pair of Bode’s Galaxy (M81) and the Cigar Galaxy (M82). In an 8″ SCT, I can only get a single of the objects in frame, but with my trusty 120mm Skywatcher wide angle refractor, I was able to frame them both very nicely with my Nikon D7000 attached.
M81 and M82https://www.flickr.com/photos/crunchmeister/14695785512/in/photostream/
I honestly didn’t expect much with deep sky shots. But I still managed to get a great shot of this pair. Deep sky imaging from city suburbs is an iffy practice at best. Luckily, I like right at the northern edge of the city, so light pollution in the northern sky isn’t quite as bad as when I aim south. So I’m hoping to get more of these under better conditions. This will be top of my list next time I go out to the Dark Sky Viewing Area.
Till next time, clear skies to all.

Where Eagles Dare

‘Tis a both joyous and woeful time. I now have access to a beautiful dark sky site – the Dark Sky Viewing Area located just north of Tamworth, Ontario. It’s a purpose-built astronomical observing area and the southern most site in Ontario devoid of light pollution. Or nearly. Long exposure photography of the southern horizon will show some glow from cities, but in all other directions, the sky is as pristine as can be. Other than the infestation of mosquitoes, this is about as ideal a location as anyone could expect to view or image the night sky.

For anyone in Eastern Ontario interested in checking out this site, you can view their web site here: http://www.lennox-addington.on.ca/must-see/dark-sky-viewing-area.html or check out their Facebook page: https://www.facebook.com/DarkSkyViewing. Trust me, if you’re serious about observing or imaging and live within a couple of hours drive from here, it’s totally worth it. Weather permitting, you won’t be disappointed. Just bring the strongest mosquito repellent you can find if coming in the summer months!

The woeful part is that the azimuth motor on my 8″ Meade LX90 died and the scope is off for repair. So that means I’m left with only a short tube, 120mm refractor for imaging for the next couple of months. Definitely not ideal for deep sky imaging. But I’m not deterred! I’ll use it till I get my main scope back! It’s the equivalent of a 510mm f/5 lens, so it provides me with pretty decent magnification. Other for some chromatic abberation on bright stars (particularly blue stars), images are pretty sharp with decent resolution. 

On Sat, June 28, I headed out with my friend Kevin – my regular partner in crime when it comes to astronomy – to see what we could image. As Kevin didn’t have a good scope, we’d normally just work together. He seems to have a better hand and eye when it comes to focusing shots than I do, so I generally line up and find the object, he does the focusing, then I get my intervalometer and we stand around chatting while the camera does its work. 

This time around, we decided to coordinate our efforts on different objects to maximize our time out there. With the scope, I focused on deep sky objects (DSO), and he focused on shots of the Milky Way using his Nikon D60 with both his 50mm and my 35mm prime lens mounted on my iOptron SkyTracker. We came up with a plan to create a mosaic of the Milky Way while I started searching (visually) for some DSOs to shoot.

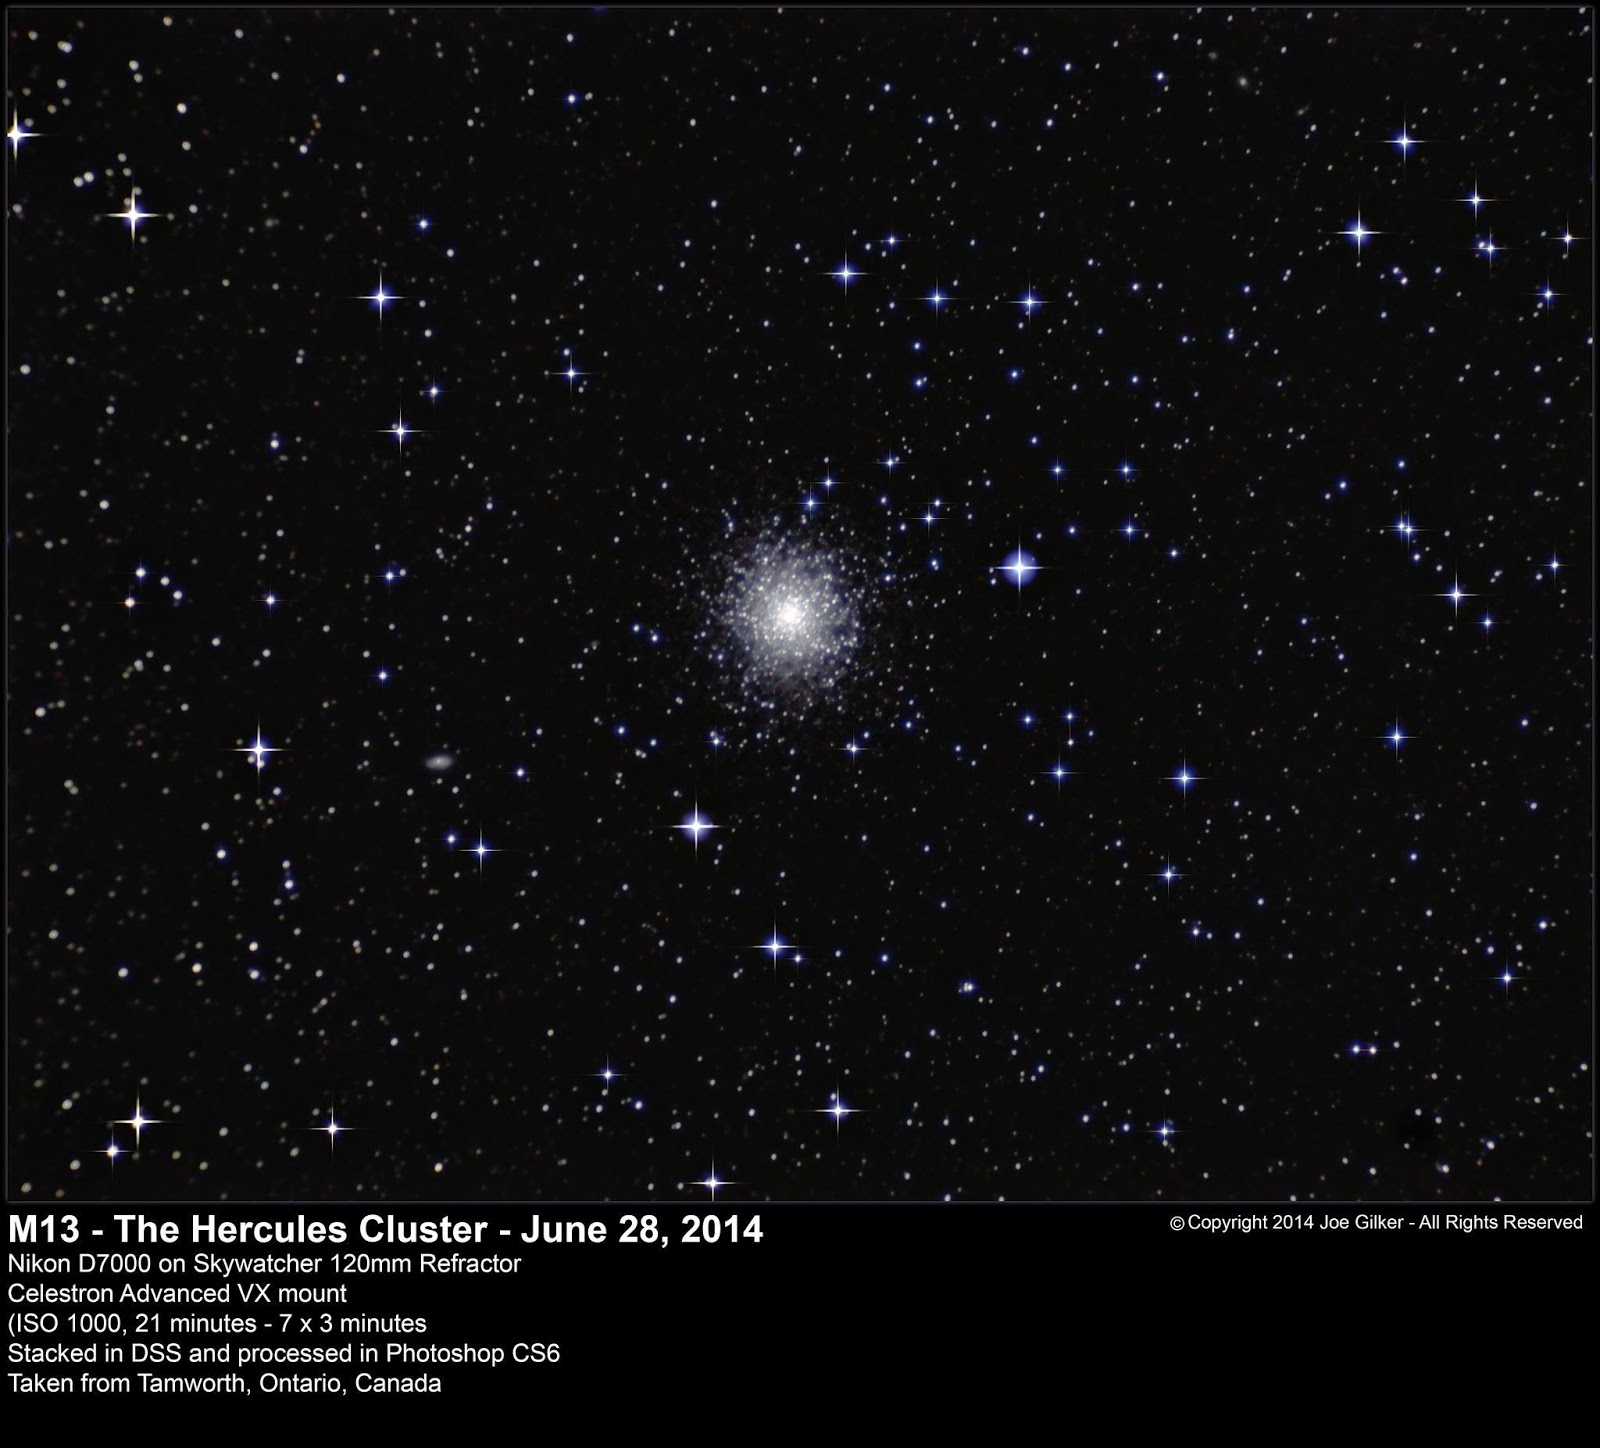
The first object that I locked onto was M13 – The Hercules Cluster. I had seen this object a couple of times in the past. I had even tried to image it once last fall as it was setting. I managed to get 1 poorly focused 30 second exposure of it before it set behind some trees. So it was high time to try to get some good shots of it. So I locked on, got focus, and snapped off a series of 3 minute exposures at ISO 1000. The results were truly astounding. The number of stars visible, even in my small refractor, were astounding. The final image looks a bit flat compared to the resolution I get from my LX90, but I’m still quite pleased with the result.

Note the images in this blog have been shrunk down significantly to fit in this limited space. I would strongly recommend you click on the links below the images to see the full-sized version on my Flickr page.

M13 – https://www.flickr.com/photos/crunchmeister/14556088593/in/set-72157637130862065/

The second target I locked onto was M16 – The Eagle Nebula. I’d tried to see this object before, but had limited success. I had tried years back using my 6″ reflector from my back yard. Finding it manually was quite a challenge, but the view from a light-polluted suburb was disappointing. It was just barely visible due to light pollution. When I finally got my 8″ LX90, I found it easily, but it was still barely visible. The visual appearance through my 120mm refractor was faint, but pleasing compared to past experiences. But imagine it brought out a lot of detail I hadn’t seen before. Even with fairly short amount of time spent on it (21 mins of exposures in the final image), the details that came out was beautiful, not to mention the rich star field that it sits in. This is a target I’ll most definitely be focusing on again in the future to add data to this image!


The final deep sky target of the evening was one of my favourites – M31, the Andromeda Galaxy. I had some mixed results with it through last summer. I finally managed to get 1 really good shot of it with just my camera, 300mm lens and SkyTracker. This time around, I managed to get some good data, although limited in time. As it turns out, I have just the right magnification with my refractor and camera to get M31 perfectly in frame! It was still fairly low on the horizon, so many of the shots I took were blurred by the atmosphere, but out of the 1+ hour of data I collected, 39 minutes of it were usable to produce this final image. It still lacks some colour and detail compared to what I COULD get, but overall, I’m very pleased with how this image turned out. 

And last, but not least, we have to get to some of Kevin’s images of the Milky Way. First, we have this 3 frame panorama of the the core of the Milky Way. This provided a rich view of the core.

Next is this behemoth of an image. This is a 13 frame mosaic of the full band of the Milky Way stitched together with Autopano Giga and some post processing in Photoshop for histogram stretching and colour correction. It’s a huge image. I would strongly recommend that people view the original on my Flickr page, download the full-size image, and zoom in on it. You won’t be disappointed! The original was over 150MB in side and 17k pixels wide. I’ve reduced it to 40% of its original size to make it more manageable.

And as a side note, on Sunday, Kevin finally bought himself a good telescope. He’s now the proud owner of a previously enjoyed 8″ Celestron NexStar SE complete with an equatorial wedge. So we’re now going to be able to image DSOs once again while I wait for my scope to come back from service. Congratulations on your new window to the universe, Kevin. I was glad to be of assistance to you in getting this fine instrument. 

Until next time, clear skies to all.

Milking It For All It’s Worth

It’s been almost 6 months since my last post here. I realize it’s a long time, but we’ve had a long, extremely cold winter that started off with a nasty ice storm just before Christmas, and another just after the new year, leaving a thick coat of slippery ice on everything much of the winter. As much as I love getting out to shoot the sky, I’m still recovering from a broken foot and ankle from last summer and wasn’t steady enough to venture out onto the ice. The few times I did get my gear out, it frosted over on me before I managed to actually get anything worthwhile. So there’s really been nothing worthwhile posting.

This spring, I started seriously looking at some wonderful images of rich star fields in the Milky Way. Some are so breathtaking with the sheer number of stars visible. I wanted to attempt taking such photos. Living in the city (albeit a small one), we never see the Milky Way without leaving the urban environment. 

Over the winter, I discovered we have the Lennox and Addington Dark Sky Viewing Area roughly 60 km away from my place. It’s said to be the most southern point in Ontario that’s free of light pollution. So this past weekend, I packed up my gear, grabbed a couple of friends, and headed out to try to get some good shots.

Most of the evening, the moon was out. We took a few shots of it, but mostly we were doing visual observing until the moon set. We got some good visuals on different deep sky objects like the Whirlpool Galaxy, various nebulae (the Ring Nebula was awesome. It was my first time seeing it), and a bunch of different clusters. It was quite a treat to finally get to use my 8″ LX90 under a pristine sky and excellent seeing conditions. 

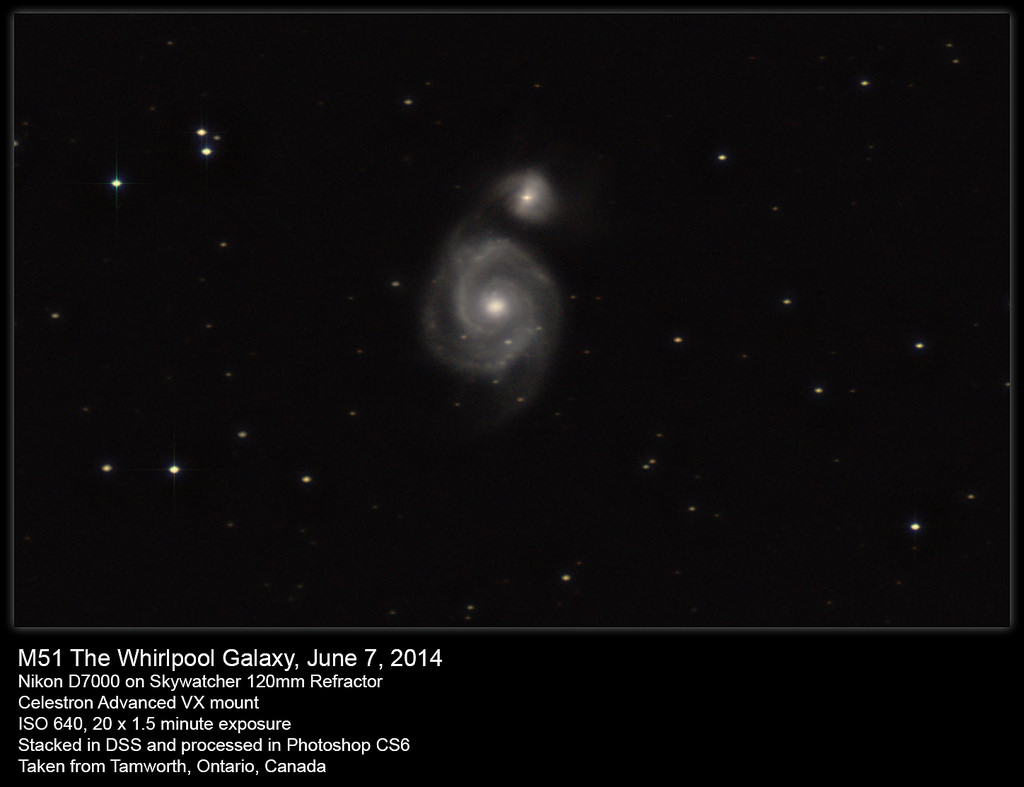
As the moon was setting, I tried my newest scope – an modestly priced Skywatcher 120mm f/5 refractor on a Celestron Advanced VX mount – to take some shots of the Whirlpool Galaxy. I attached my Nikon D7000 and went to work. I wasn’t expecting much from a non-apochomatic refractor of this size, but still managed to get some pleasing images of M51. I took a a total of 20 90-second light frames along with some dark and bias frames. I didn’t expect much, but the result turned out better than I expected. I’m really looking forward to imaging it with my LX90 on a future visit to the site on a moonless night.


Once the sun had set, it was time to have some fun with the camera and my friend’s nice 50mm f/1.8 lens. We mounted it on my D7000 and put it on my iOptron SkyTracker. I found a nice random spot in the Milky way, and fired off a some test shots. Once I had settings that I was happy with, I tried a 15 second test exposure. The result was pretty pretty much perfect. I had found the sweet spot. It’s only later when I was processing the image that I discovered that a meteor had streaked across the sky as I was taking the shot. And it was perfectly centered in my field of view, as can be seen in the photo below. There was no cropping here. This is as it came out of the camera, with only some stretching of the histogram, some star diffraction and framing applied. This was nothing but sheer luck, but it was absolutely perfect.


It was getting rather late at that point, but wanted to get a really rich image of the milky way. So I randomly chose a new spot that looked good, set my timer and grabbed 9 30-second exposures, 5 dark frames, and some bias frames for stacking. The light frames looked good, but it’s not until I stacked and processed the image the next day that I truly saw how awesome the shot came out.The number of stars visible in this image is really quite mind-blowing, particularly when considering this is just a small patch of the sky.


So all in all, it was a great test run at a new site with some new equipment. I now have a 35mm f/1.8 lens on the way and I really can’t wait to take more deep sky images with it at this site. This summer is likely to be quite fruitful when it comes to imaging. And with that, I hope to be able to be able to update my blog more often with each subsequent imaging session. 

Until next time, clear skies!

The Hunter Becomes the Hunted

With winter being in full throes (despite the fact it hasn’t “officially” started yet), one signpost constellation is Orion  the Hunter, which magesitcally covers a rather wide area of the southern sky.This constellation is full of lore and myth from different cultures. But that aside, it’s a wonderful image on the tapestry of the night sky through the winter. And it’s the target of many amateur astronomers and astrophotographers due to its myriad of nebulae contained therein.

I’m really not able to find a definitive answer as to how many nebulae it contains. Figures tend to range from 10-20, depending on who you ask. Either way, there’s no shortage of stuff to see. The Great Orion Nebula, the Running Man Nebula, the Flame Nebula, The Horsehead Nebula, and Barnard’s Loop are among some of the wonderful sights that can be seen and photographed. It’s a cornucopia of targets for those willing to search them out and patient enough to find and perhaps image them.

Through the winter, I’ll be making several of the well-known objects in Orion my target. I’ve already started with the Orion and Running Man Nebulae, as well at the Flame and Horsehead. Both have been featured here in previous installments of my blog. All are simply 1 hour’s worth of 30 second exposures at this point. I’ll be adding more data to those over the coming months.

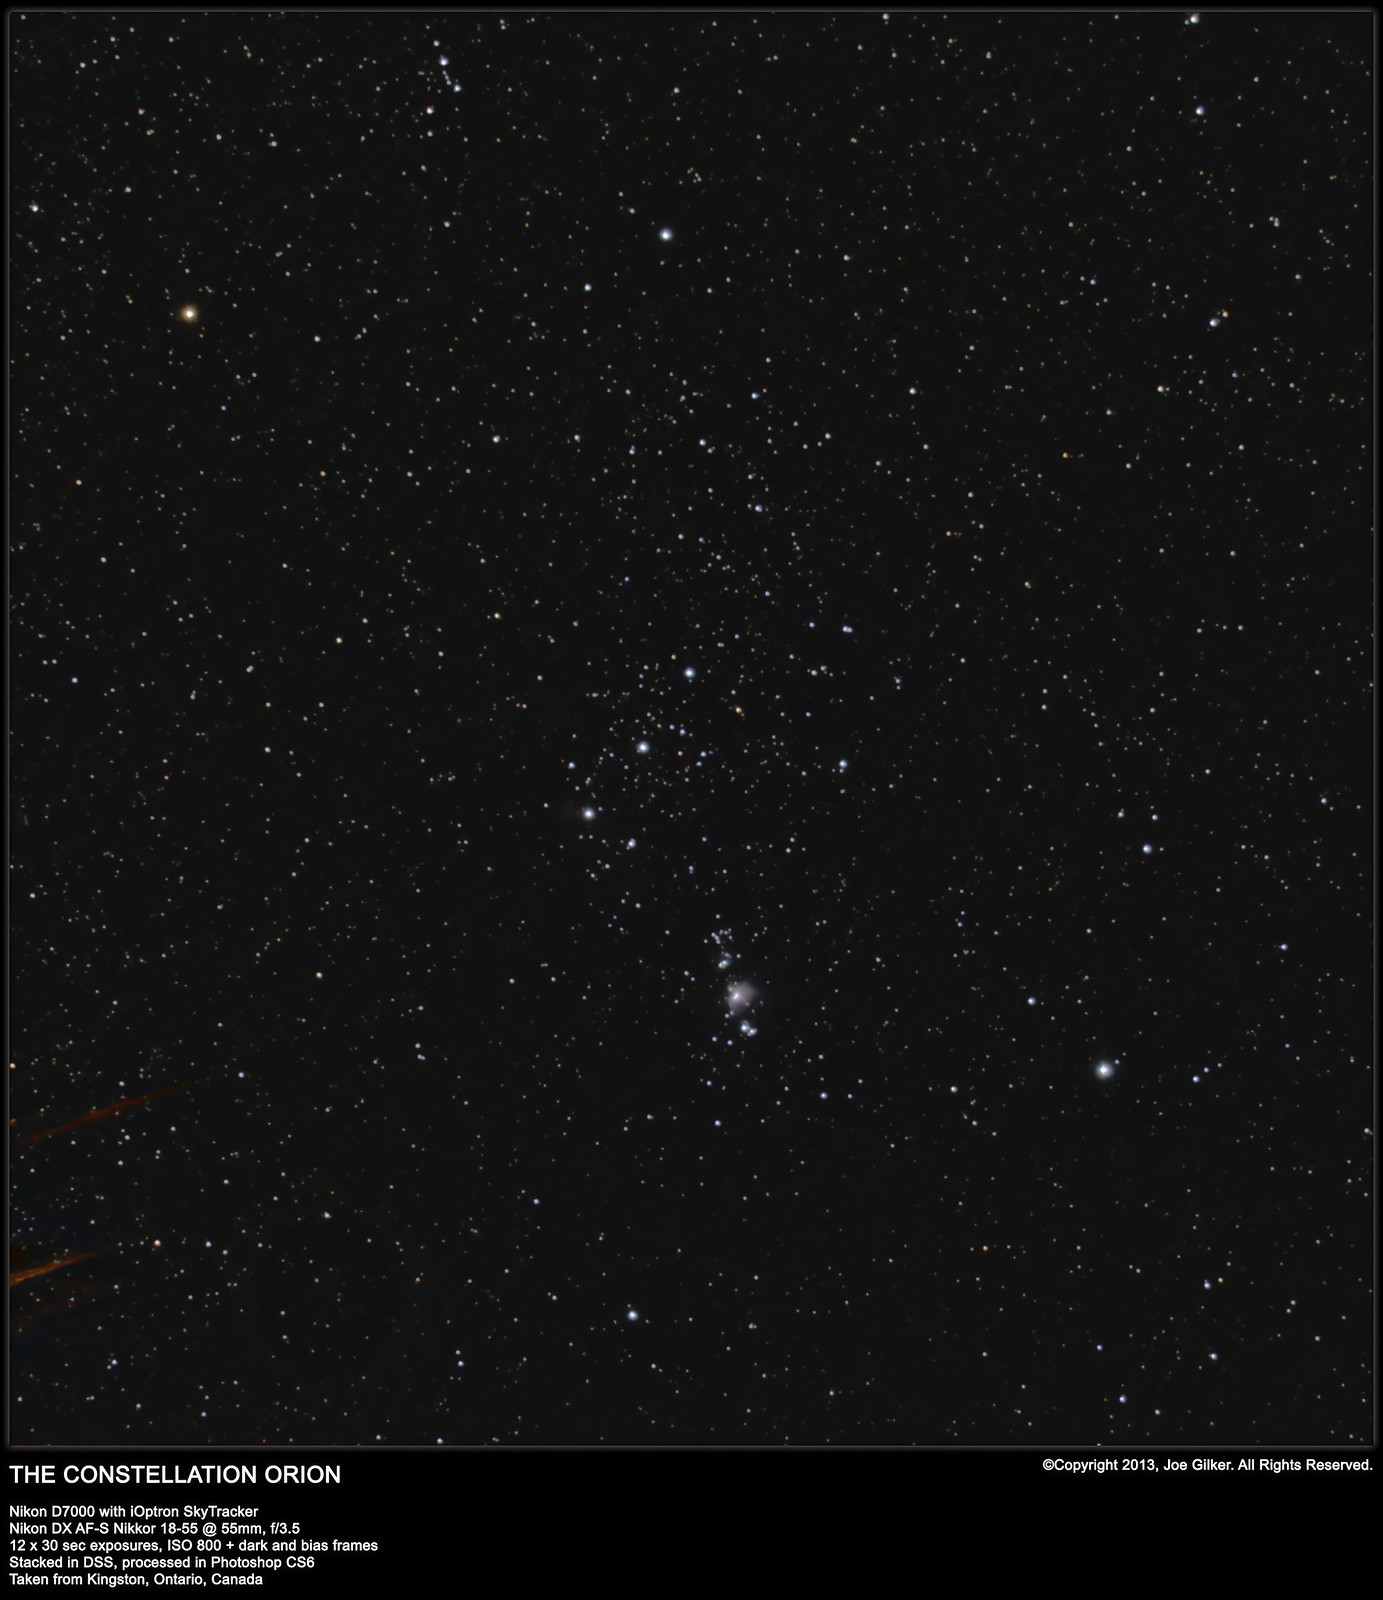
But on a very cold evening a few nights ago, I stepped out with my camera and SkyTracker. The seeing was about 3/5 with a 60% moon in the western sky. I decided that photographing the deep sky objects wasn’t going to bear great fruit, so I figured I would try to catch the entire constellation in one image. I popped on my 18-55mm lens, aligned my mount, and fired off a bunch of 30-second subs, darks and bias frames.

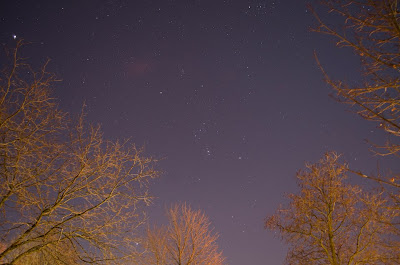
The resulting subs didn’t look like much.  Once stacked, the light pollution and gradient in the background made me think that this would be a lost cause, can be seen by this image. The trees in the foreground weren’t a big issue, as I planned on cropping the image anyway.

Orion, the Hunter
One of the subs (light frames) that was stacked for the final image below.
Jupiter is visible in the upper left corner.

Then it came to processing the image. I was able to remove the gradient and get a nice neutral, dark background. It actually turned out much better than I had anticipated.  Betelgeuse shone magnificently. M42, the Orion Nebula was clearly visible, and I even managed to get a faint hint of the Flame Nebula. Overall, I’m very pleased with the results of this session.

http://www.flickr.com/photos/crunchmeister/11333572226/in/photostream/

Clear skies.

The Horse(head) Whisperer

It was a chilly night. -6ºC / 21ºF. It doesn’t sound like much, but standing out in the cold, you feel the chill quickly. But it was the first clear night in 2 weeks, and the 3rd in over a month. I was really looking forward to photographing my latest target – The Horsehead Nebula.

I’d tried the Horsehead 10 days back when I was giving my new SkyTracker it’s test drive from a semi-dark site just out of town. That night, I got fantastic views of the Pleiades and the Orion Nebula. I’d left the Flame and Horsehead nebulae as my last targets for the evening. The first 2 targets went great. Alas, after I after a few shots, I stepped out of my warm car to check out my on my focus and alighnment. All was great. But apparently, I must have bumped my tripod out of alignment. When I checked again about 40 shots later, all I found in my subs were bad star trails. So in all, I only managed to get 13 useable subs.

What I did get wasn’t too bad. I managed to get a semi decent view of the Flame Nebula. But my real target, the elusive Horsehead was just a faint spot in the image – barely visible to the trained eye, and invisible to anyone who doesn’t know where to look for it.


So last night, it was time to get cracking and try to capture this target. I knew I wouldn’t get much with 30 second exposures (which I’m still limited to at the moment as I wait for my remote shutter control / timer to arrive). But with enough subs, I was pretty sure that I could capture it at least enough to make it visible. 

Neither the day or the forecast had looked very promising, but I took a peek outside at about 10PM, and sure enough, the sky was clear with only the occasional thin cloud blowing through. The moon was in the western sky, so that was definitely playing against me. And of course, I was in the city photographing from my driveway. It certainly wasn’t perfect, but it was the best sky I’d seen in weeks, so I had to take advantage of it.

100 minutes, 120 subs, 30 darks and 30 bias frames later, I packed up my gear and headed back inside. I unloaded the contents of my camera onto my computer, loaded it all up into DeepSkyStacker and went to bed due to having work in the morning.

I quickly checked in on my stacked image first thing in the morning. I opened it in Photoshop, did a bit of quick and dirty stretching just to see what I had captured, and sure enough, the Horsehead was visible. Perfect! Coming home for lunch, I processed it properly. The result is what you see below.

The Horsehead is clearly visible. It’s faint and not very detailed, but considering the sky conditions and the fact it was taken with nothing but a camera, I’m pretty pleased with the final result. I’m looking forward to shooting this again over the coming weeks as it rises earlier in the evening. I’ll be able to take longer exposures and hopefully get even more detail out of this beautiful nebula. But for now, I’m pleased.

And here is the result of last night’s outing. Still doesn’t top the previous pic of M42 I took, but considering this is a difficult object to capture properly, I’m very happy.

Murphy’s Law of Astronomy

It’s an unwritten rule of the universe. It’s like the sky wants to spite me. But without failure, every time I get a new telescope or accessory, it’s usually nice and clear in the days leading up to receiving it, and then cloudy for at least a week after receiving it.

It sucks!

Clear skies! (because I don’t have any)