TRACKING THE SKY
For the last 3 years, my lightweight portable tracker consisted of an iOptron SkyTracker. It was my primary photography tool through the winters when hauling my scope outside wasn’t always feasible, and through the summer served me well for long exposure Milky Way photography and time lapse sequences.
But while this fine little tracker served me well and provided me with some really great shots of the sky, it left me disappointed about a month back when without warning, it decided to give up the ghost on me as chronicled in this blog post. [EDIT: it has since been repaired] Winter is rapidly approaching and I needed to get a replacement stat! Enter the Sky-Watcher Star Adventurer!
Why the Star Adventurer?
At first, I had considered replacing my SkyTracker with the new SkyTracker Pro. But looking into the different trackers a bit more in-depth, I realized the SkyTracker had several advantages over the SkyTracker series.
- It’s a true German equatorial mount vs a tracking platform whereas the SkyTracker series and Vixen Polarie are tracking platforms. While both provide the same function, the ability to have a counterweight to help keep tracking accurate under heavier loads was a big factor. The counterweight option is available on the SkyTracker Pro, but the Star Adventurer has a maximum payload of a full 2kg more. It seemed a better option, as I do have a couple of rather heavy lenses.
- The Star Adventurer comes equipped at an ST4 guide port to use with an auto-guider. This may be helpful down the road as I plan on getting a standalone autoguide (vs my current guide camera / laptop setup)
- It’s a multipurpose mount with pan effects for any type of time lapse photography. I’ve been getting more into time lapse photography since last summer so I figured this could be a useful tool for this purpose. I particularly look forward to using in this manner the next time I’m out shooting the Aurora Borealis.
The Bundles
The Star Adventurer is available in 3 different bundles at 3 different price points.
The first includes only the mount. While the price looks attractive, you need to provide all the extras needed to use the mount. On its own, there’s not a lot you can do with just the mount. You can attach the mount to a normal tilt-pan head and properly align it, it’s not as easy or accurate as with the equatorial wedge designed for it.
The second, the Photography Bundle, includes the equatorial wedge and ball head adapter. To me, unless you positively have everything else you need, this is the minimum bundle I would recommend buying. You just supply the camera, a ball head and a tripod, and you’re in business.
The 3rd, the Astro Bundle, comes with everything in the previous bundle, but also includes an extra mounting bracket with a counterweight for mounting heavier loads or small telescopes. This is the package I opted to buy.
In the Box
With the Astro Bundle, you get everything you need except a ball mount and tripod. Included are:
- Star Adventurer mount
- equatorial wedge
- 3/8″ ball head adaptor
- Fine-tuning mounting assembly
- Counterweight and bar
- Polar scope illuminator
- 1/4″ to 3/8″ thread adapter
- DSLR shutter release cable
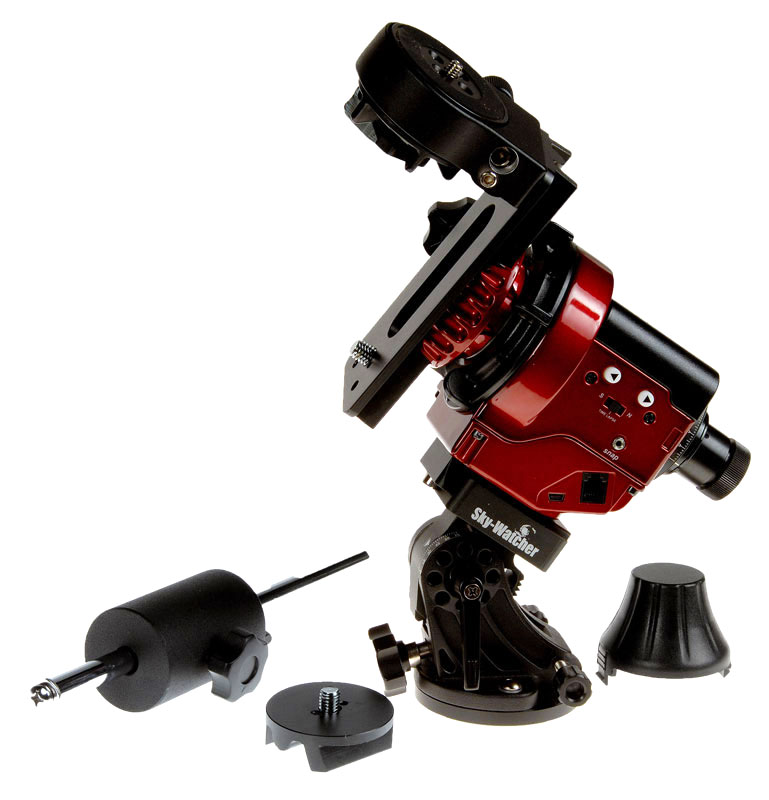
The mount body itself is a solid metal unit that feels hefty and looks to be very well built. It has very simple, easy to understand controls. On the outside is the mode control knob, a direction switch, 2 multi-function buttons, a USB port (for firmware updates and power in the field), an ST4 guide port, and a DSLR shutter control port. Other notable features are a great right ascension clutch system that positively locks the right ascension axis, and that the unit accommodates standard Vixen-style doveplates. Built into the body is a polar scope covered by a plastic end cap. The unit is powered by 4AA batteries or via the USB port.
While everything looked incredible and solid, 2 things stood out to me as being a little flimsy. The plastic cap that covers the polar scope is of a very stiff, but light plastic. The 2 prongs that attach it into place don’t seem very solid to me. I fear that this plastic will be terribly brittle in the cold and could potentially break easily. A softer plastic cap or an aluminium cap that screws on would in my opinion be a better choice. It would increase the cost of the unit a bit, but would be worth it.
The cover to the battery compartment is also made of this same plastic. To me, it feels cheap when comparing it to the solid aluminium the rest of the unit is made of. It seems to work and fits well. I don’t think it would fall out. But it just looks odd to have something feeling so flimsy on such a solid unit.
The equatorial wedge attaches to the bottom of the mount with a standard 3/8″ connector like most camera equipment. It also has a good weight and is built of solid materials to ensure there is no flex. It has standard locking altitude and azimuth controls with fine-tuning screws that make polar alignment very easy. Anyone who’s used an equatorial mount with a telescope will be immediately familiar with this setup.
Also included is an illuminator for the polar scope. It attaches to the front of the mount and provides a red light to illuminate the polar scope during alignment.
The next 2 items are the mounting options. The first is a small ball head adapter used for tracking with just a camera. It attaches to any standard ball head with a standard 3/8″ connector. On this underside of this adapter are Vixen dovetail plate rails that allow it to be locked securely into the Star Adventurer. This option is used when you’re just tracking with a lighter-weight camera and lens combo.
The second is a Vixen dovetail plate with a “Fine Tuning Mounting Assembly” on one end. This is used for mounting heavier loads like cameras with heavy lenses or small telescopes. On one end of the plate is the fine tuning mount. It has a 1/4″ screw to attach it to a camera or small telescope. A 3/8″ adapter is also included for attaching to other equipment. This acts as the declination axis of the equatorial mount. Its clutch system is similar to the main RA clutch on the Star Adventurer and very solid. It also includes a knob that acts as a slow motion control on the dec axis to make framing your target even more convenient. At the other end of the dovetail is a threaded hole into which the counterweight bar is screwed to balance out the load.
The package also includes a DSLR shutter control cable to allow the Star Adventurer to control your camera’s shutter. Cables are available to cover most of the popular camera models from Nikon, Canon, Sony, Olympus and so on.
What’s Not Included
While you get a great set of accessories with the 2 higher bundles, it doesn’t include everything you need to get started. You’ll need to supply:
- a sturdy tripod
- a sturdy ball head
- a 3-way tilt-pan head if you only bought the basic unit
- 4x AA batteries or an external USB power supply
Onboard Functions

The Star Adventurer has very simple controls for basic operation. A mode dial allows you to switch from 7 different tracking rates. You get Celestial (1x sidereal), solar, lunar, 0.5x, 2x, 6x and 12x tracking rates. The first 3 are for their intended purposes, whereas the other 4 tracking rates can be used for time lapse photography. Adjusting the wedge at 90º, the tracker can be used as an azimuth panner for landscape time lapse photography. The N/S direction switch controls the direction.
Although I didn’t use it, the onboard camera shutter control is a nice touch for someone traveling light. For deep sky tracking, it can be set for 50 or 100 second exposures in the northern hemisphere, but only 100 second in the south. I didn’t find the onboard shutter control terribly useful with only 2 selectable shutter times for celestial photography, but that’s more of a matter of personal preference. I prefer the programmability of my intervalometer and would rather use that instead. Switching the mode dial to alternate tracking rates change the shutter modes. These different rates and panning patterns are fully explained in the manual if you need more information on the subject.
It’s to be noted that only basic panning and shutter function is available with the stock firmware. By installing the advanced firmware, it’s possible to adjust different panning angles, shutter lengths, etc. This can be quite useful for some really creative motion time lapse.
As noted, the unit comes with an ST4 guide port allowing you to use the unit with an autoguider scope and camera. It will accept single axis RA guiding corrections from any guide camera / computer combo or standalone auto guiding unit. which makes this mount a potential deep sky monster that could potentially allow you to tracks 15+ minute exposures without any drift.
But of course, all this is nice to have on paper. It means nothing if the mount doesn’t perform as expected in the field. And that’s where the true test is.
In The Field
After a quick scan of the manual, I knew everything I needed to know about how to set it up and use it for basic operation and was ready to take it for a test drive. I drove out to one of my favourite spots at Camden Lake near Moscow, Ontario, and set up my gear. I mounted the Star Adventurer on my trusty Manfrotto 055PROB mount, which is a pretty solid tripod. It should be noted that if you have a lightweight, wobbly tripod, you likely won’t get good results. Even without a camera, the SkyTracker is fairly hefty. Add the counterweight and fine-tuning mount, and you add even more weight before the camera is even added. I could trust my lighter duty Manfrotto 190PROB with my iOptron SkyTracker, but I would consider my 055PROB to be the minimum I could get away with using the Star Adventurer. A lightweight tripod won’t cut it. If you plan on buying any tracker, invest in a solid tripod first.
The alignment was fairly simple, but not as smooth as I hoped it would be. I had assumed the larger teeth and controls on the wedge would perform better than the SkyTracker. The azimuth controls work flawlessly, but I found that locking the altitude axis will cause the mount to shift a bit from polar alignment. I had to fiddle with it a bit to get it perfect. It takes a bit of over or under adjustment at times so that Polaris will be at the right position after the axis is locked. The effect is less pronounced than it was on my SkyTracker, but it exists here as well. I was hoping that a mount that was way more solid wouldn’t have this type of loose tolerance in the wedge. It’s not a show stopper, and once locked into place, it’s solid. But it is an annoyance when aligning.
Another sore point I had during the alignment process was the polar scope illuminator. It’s a removable part that clips into the top of the mount when you align. And in terms of providing light, it works well. Its design, however, is rather cheap and not well thought out. There’s no power switch. Switching it off requires unscrewing the battery cover. You have to unscrew it almost 100% of the way out in order to turn the light off. This means the cap can easily fall off and be lost. Failing to unscrew it enough means the illuminator battery will be dead the next time you use it. Why Sky-Watcher thought this was a good idea as opposed to a small power switch boggles my mind. In my opinion, it wouldn’t have been hard to illuminate the mount internally, which would have done away with this nuisance of a part and been far useful.
A minor gripe I have with the polar scope and alignment is that you align the mount without a load, which can cause a slight shift after you mount your equipment. When using the fine-tuning mount and counterweight, you can still look through the polar scope to check for alignment, albeit without the illuminator (I used a red flashlight for the job). When using the ball head adapter, the polar scope is completely obscured. But despite this, within a few minutes, I was aligned, my camera was attached, and I was ready to start shooting.
Beyond this, operation of the Star Adventurer was simple and effortless. There’s nothing really really more to say here. If you’ve done your alignment properly, you’ll have accurate tracking for exposures up to several minutes, depending on the focal length of your lens.
The Results

I lucked into a clear night on the day I received the mount. I tested the system using just the ball head adapter. I used my lightweight Nikon D5100 paired with my heavy Nikon 24-70 f/2.8 lens. I zoomed in to 70mm (105mm equiv for full frame) and targeted the region around Deneb, in Cygnus. I decided to forego the onboard camera control and use my external intervalometer set to 5 minute exposures. I wanted to push this mount hard to see what it really could do.
I shot a total of 1H40M of 5 minute exposures at ISO 800. Out of that, only 4 showed any signs of trailing and had to be rejected. In all others, the stars were nice and round. Tracking had been true and accurate the entire time. This picture is the result. The North America and Pelican Nebulae can both be seen clearly. The fine dust lanes of the Milky Way are visible adding fantastic contrast to the overall image. Stars are tack sharp everywhere but the edges (image was cropped) due to comatic aberration in the lens. I have to say, I was quite impressed with its performance.
So I knew for widefield astrophotography, this mount is as solid as it gets. Come summer, I’ll be using it with a wide angle 13mm lens on my full frame D750 to shoot long, low ISO exposures of the Milky Way core. I think I found the perfect tool for that job.
My second night out was on the next clear night about a week later after a spell of cloudy nights. I decided I’d try a different perspective on the same target. Once again, I took the 30 minute drive to Camden Lake and set up my equipment. This time, I fitted my 55-300mm lens and zoomed in to 200mm (300mm equiv) at f/5. I framed up the North America Nebula and tried some different exposure times to find the optimal exposure for this focal length and breezy conditions, finally settling on 2 minute exposures. This seemed to deliver consistently good results. So I set about shooting the nebula again at higher power.

I was hoping to be able to capture about 2 hours worth of exposures to really capture the faint nebulosity in that field of view, but unfortunately, heavy cloud rapidly blew in after less than an hour of shooting. I only managed to have 24 good frames shot at ISO 1600 that had no cloud. Happily, I had no trailing in any of my images, so all 24 cloudless frames were useable for my final image.
Despite the short integration time for these faint nebulae, fine details and structure are clearly visible with nice detail. It showed that the Star Adventurer is able to handle good weight loads while tracking very accurately.
I was plagued by clouds again for another week or so before I managed to get out again. This time, I decided I would push my zoom factor even more and test out the fine-tuning mounting a assembly and counterweight. Not feeling like driving out too far due to questionable skies and breezy conditions, I drop just north of the city out of the bar light pollution and set up with the intent on shooting the Pleiades Cluster and the Flame and Horsehead Nebulae.
For this test, I decided to use my heavier Nikon D750 my 55-300mm DX lens. This causes my camera to switch to DX mode, giving me the standard 1.5x crop factor and an equivalent length of 450mm with that lens set to 300mm.
First on my schedule was the Pleiades Cluster. The cluster was high in the sky and out of the bulk of the light pollution. I set up my Star Adventurer, balanced my load using the counterweight just as I would on my telescope mount, and pointed up to the Pleiades. The I locked in my clutches, framed up my shot using the declination fine tune controls, and started shooting 2 minute exposures at ISO 1600. I shot a total 90 minutes worth of exposures, but found that due to the wind, many were shaky. In all, 27 of the 45 images made it into the final image. But the tracking was accurate with pinpoint stars for all of those shots where they weren’t disturbed by strong gusts of wind.
Next I pointed at the Flame and Horsehead pair. Unfortunately, they were hanging in the light dome of the city so there was a lot of background glow. But for the purpose of this test – which was to test tracking accuracy, this would have to do. I continued my shooting program of 2 minute exposures at ISO 1600. During this time, the wind started getting worse. I packed up after just over an hour as I knew I wouldn’t be able to get anything good. But much to my surprise, I ended up with 21 good pictures with nice round stars. Not as much as I would have hoped to get, but not a bad start. Despite the extremely short integration time on this latter image, I managed to capture one of the best images of this pair I’ve gotten to date.


Performance
As they say, a picture is worth a thousand words. While I wasn’t able to shoot under ideal conditions, the results posted above do show that tracking is accurate and the mount performs as advertised for night sky photography. As with any equatorial tracking mount, good polar alignment is key. Once you’re aligned, the Star Adventurer is a solid mount capable of tracking the sky accurately. And that’s what really matters.
Mounting a Telescope
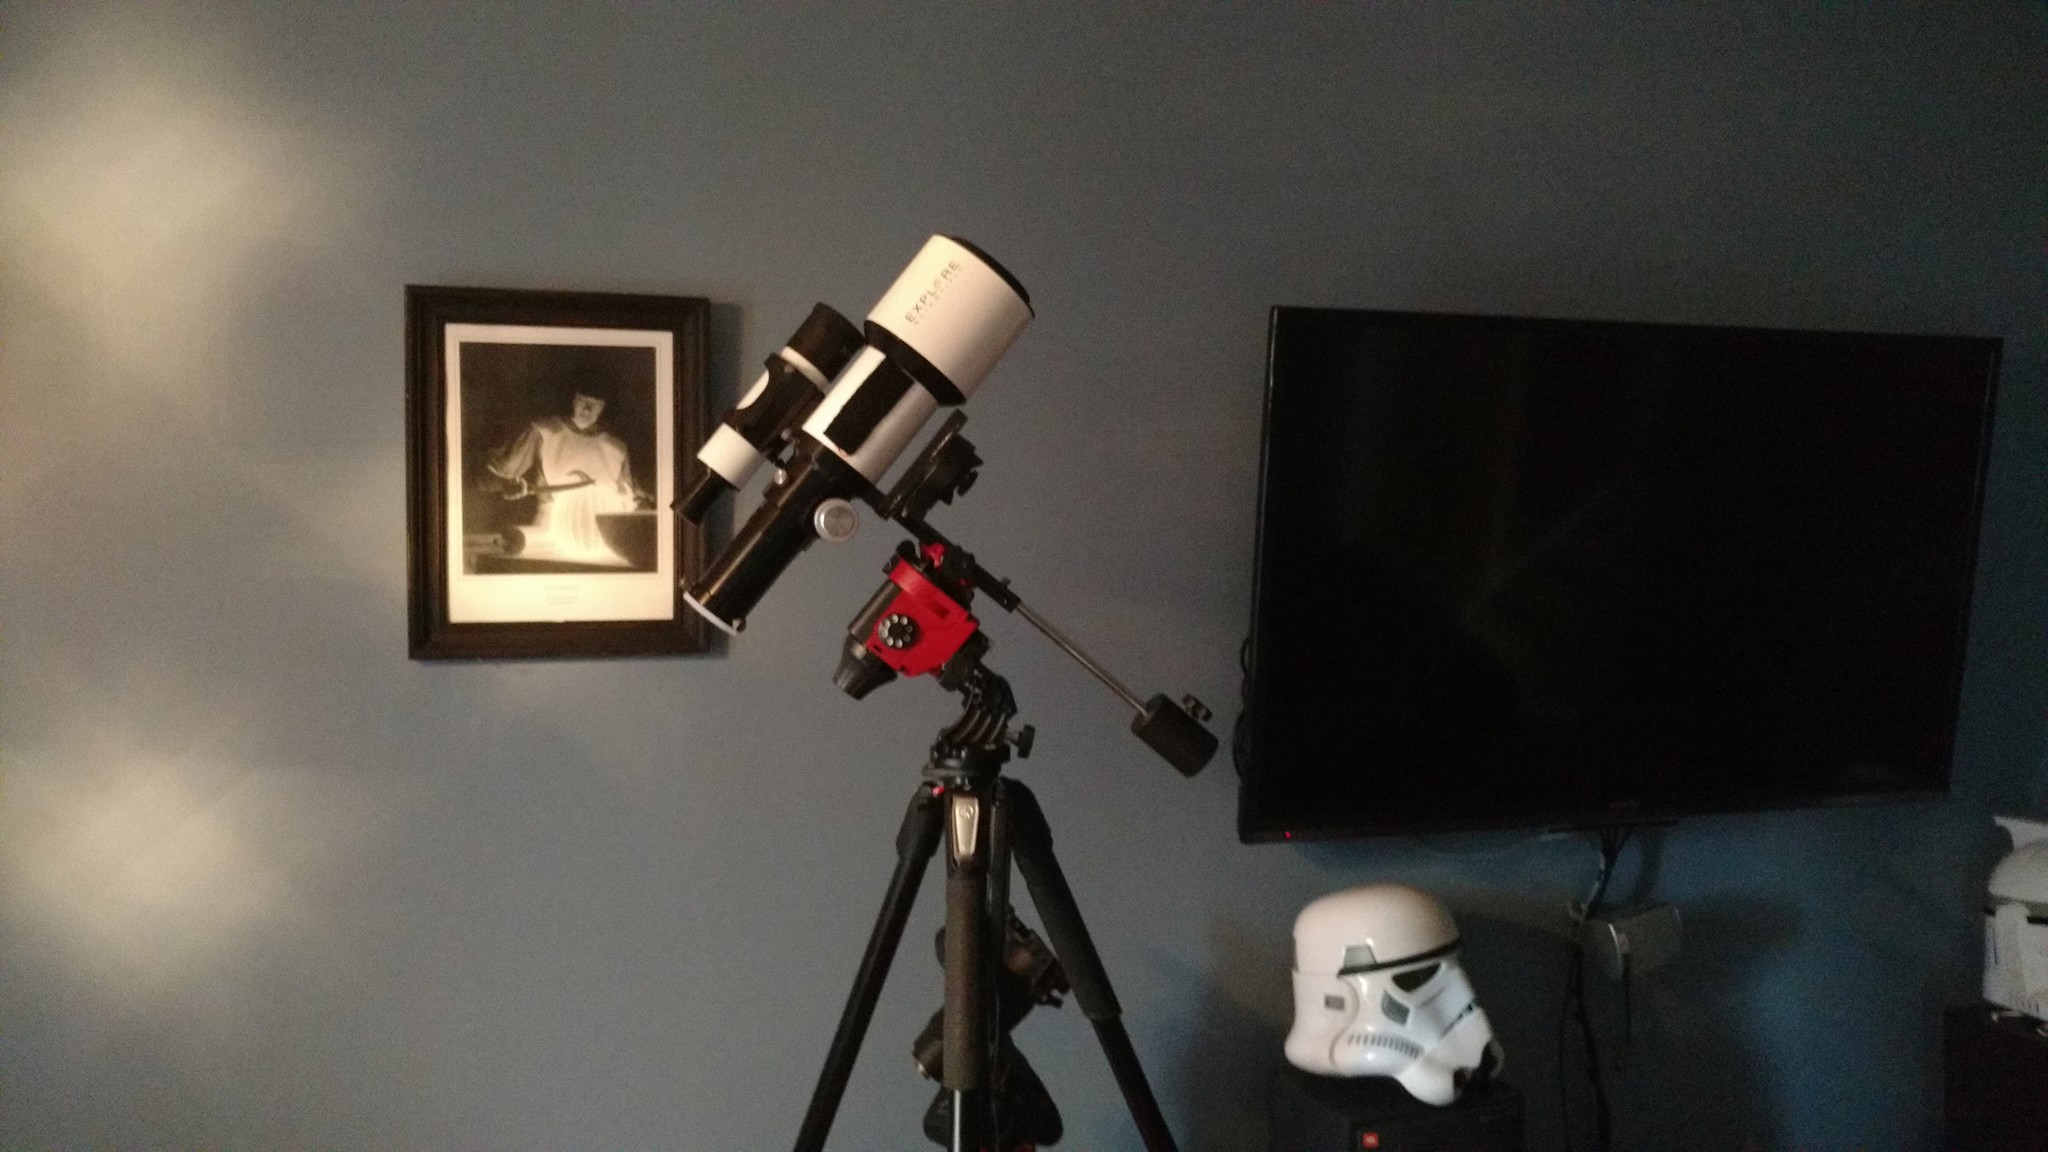
The Star Adventurer boasts being able to mount small telescopes. I was eager to try this, as it would be a great grab and go mount for winter imaging. At 5.5 lbs, my compact Explore Scientific ED80 triplet seemed to be a great candidate. With the added weight of my D5100 which is just over 1 lb, I would still be well under the mount’s maximum payload.
My scope attached easily. However, right away I could see problems. The counterweight isn’t nearly heavy enough to balance the scope. Not even close. It would take a much heavier counterweight to balance out my ED80 and a camera. Also, since the scope is attached using the 1/4″ bolt form the fine-tuning head, there’s no way to balance the scope on the declination axis. Honestly, I’m not sure anything more than a small 60mm scope would be suitable with the included weight, and even then, I think the declination balance issue would still be there. I fear that adding more counterweight would likely require a heavier tripod than what I currently own, as it didn’t seem very sturdy with all that weight on it. Perhaps it’ll work, but that still needs to be field tested. Once I get a chance to try it, I’ll post an update
CONCLUSION
The Good
- solid build quality
- impressive maximum payload of 5kg (11lbs)
- ease of use
- superb tracking
- onboard control for camera shutter
The Bad
I’ll preface this list by stating that these points aren’t anything necessarily wrong with the mount, but rather things that could have been done better.
- the wedge could be made to better tolerances so that tightening the lock doesn’t cause the mount to shift position
- plastic scope cover feels cheap and weak
- plastic battery cover seems to cheapen the overall feel of the unit
The Ugly
- the polar illuminator is utter rubbish in build and design. Yes, it works, but it’s an inconvenience in so many ways I would rather not use it.
Bottom Line
If you’re looking for a a solid equatorial tracking mount for your camera, then the Star Adventurer will provide everything you need. It’s an easy to use system that will have you up and running in minutes. It has some impressive features and modes for night sky photography, and even more to offer for other forms of motion time lapse photography. That’s even truer if you install the advanced firmware.
If you’re looking for a solid tracking mount for you camera, the Sky-Watcher Star Adventurer should be one of the top contenders on your list.