The last few days have not been without their challenges in processing my images. As I posted yesterday, I got some really great data on my Friday evening photo session, but have been unable to process the resulting images to any degree of satisfaction.
With some support and advice of some of the great folks over at the Astrophotography / Amateur Astronomy Enthusiasts group on Facebook, I managed to process two of my images not only to my satisfaction, but well beyond my expectations.
The first was a wide field combination of M42, the Orion Nebula and NGC 1977 The Running Man Nebula. The detail that I managed to pull out here was actually pretty stunning considering this was nothing but a collection of 30 second exposures at ISO 800. I really didn’t expect this much detail. I pulled out as much detail as I could. Of course, the core was a big burned out, as is expected from this nebula. I went and found one of my earlier telescopic imaged of M42 where the core was very detailed and the Trapezium was nice and sharp. I scaled and aligned the image and with layer masking I Photoshop added a nice, sharply detailed core to my image.
I also played around with the HDR process. I create an HDR version of my original image, and layered it on at 50% with screen blending. The highlights and shadows just jumped right out of the screen. I finished up by adding a very subtle false luminosity layer. I took the HDR version, converted the image to an Lab Colour format (LRGB) and pulled out the luminosity layer. I layered that over my final image. That brought out some of the nice highlights and subtle detail that would otherwise have gone unnoticed. And this was the final result.
 http://www.flickr.com/photos/crunchmeister/11181614644/in/set-72157637130862065
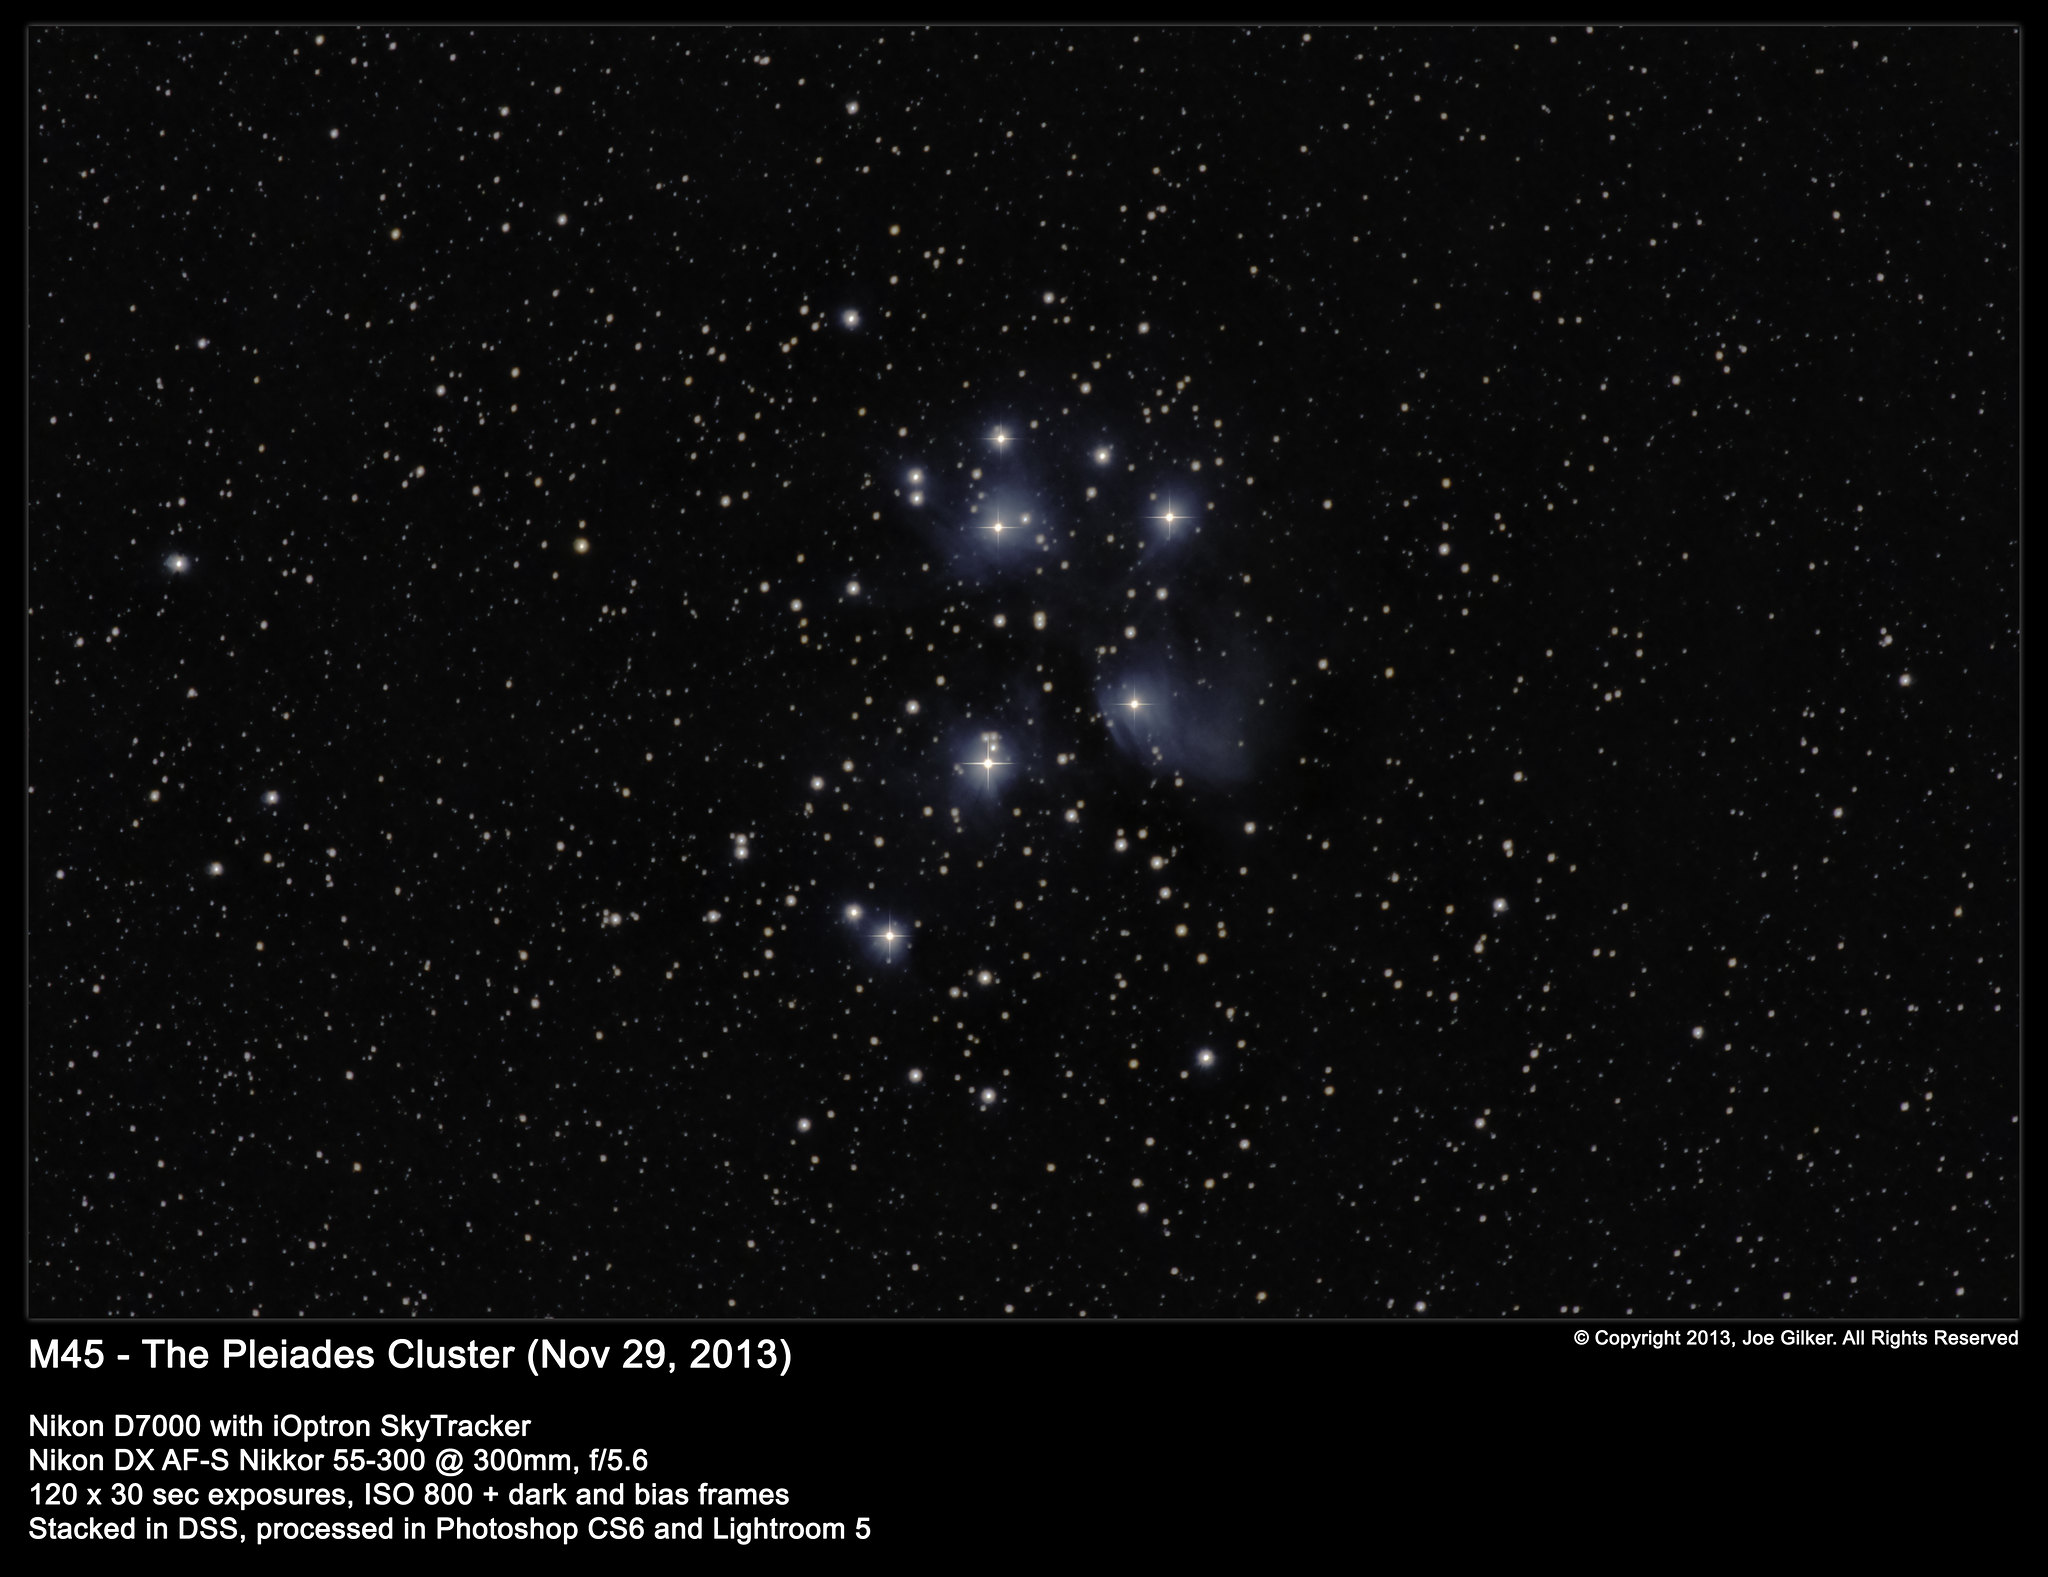
The next to roll off the line was M45 – The Pleiades Cluster. I’d taken a few images of this cluster before, but my images always turned out rather flat. I’d always taken them from a tripod with the camera without any tracking, so I was limited to 1.6 second exposures when using my 300mm lens to avoid any star trailing. As a result of these short exposures, I got really sharp detail and good noise reduction, but never managed to capture any of the beautiful blue nebulosity in the cluster. The nebulosity really required longer exposures which I really wasn’t equipped to handle at the time.
This time around, I managed to pull out 120 x 30 second exposures. This was enough to bring out a fair amount of the nebulosity. I wanted to collect more data, but with M45 being right overhead, frost was starting to form on my camera lens, so I had to quit. But what I did get in terms of raw data left me quite pleased.
My first attempts at processing this image were very frustrating. No matter what I tried, I was unable to get anything but white or grey results. M45 is famous for it’s blue colour, but try as I might, I was unable to pull out these blue tones. Even trying to insert false colour wasn’t working out for me. But it turns out that being inexperienced with Photoshop, I was going about it the wrong way. Advice given to me by members of the aforementioned Facebook group pointed me in the right direction. As a result, I now know how to adjust the colour balance of my images properly to bring out the natural colours.
And the result of my data:
 |
| http://www.flickr.com/photos/crunchmeister/11182359896/in/set-72157637130862065/ |
Now I still have a new image of M31 I need to process, and as I left for work this morning, I set the Flame Nebula image I took to stack again in DeepSkyStacker. Hopefully I’ll be able to apply the new techniques I leaned yesterday to this image and pull out some more detail out of it. I’ll be trying to process my new M31 data after that.
So all around, I must say that I’m very pleased with how things have gone and very pleased with my progress to date. It seems the dark art of astrophotography is really a multi-disciplinary pursuit. It’s dependent not only on the weather and proper setup of the photographic equipment, but also highly dependent on the Photoshop skills of the person processing the image.
And unlike what people may think about Photoshop in how it’s used in the modelling industry to retouch photos and make models “perfect”, when it comes to astrophotography, we aren’t faking an image or editing it in a way that we’re falsifying the data. Photoshop is used to pull out colours and subtle details that are initially hidden to the eye. No false data is added. This is the true appearance of the object being photographed.
So that all for now. Hopefully my next blog update will be the review of the iOptron SkyTracker I’ve been working on.
Clear skies!
1coerced
michigan gay chat https://bjsgaychatroom.info/
gay grandpa dating https://gaypridee.com/
gay cumshot chat https://gaytgpost.com/
live gay young male sex chat rooms https://gay-buddies.com/
gay chubby chaser dating https://speedgaydate.com/
igt free slots https://2-free-slots.com/
sim slots free games https://freeonlneslotmachine.com/
virtual strip slots https://candylandslotmachine.com/
caesars slots free https://pennyslotmachines.org/
quick hit slots https://slotmachinesworld.com/
free casino games slots https://slotmachinesforum.net/
wow character slots https://slot-machine-sale.com/
in the money slots https://beat-slot-machines.com/
obama slots https://download-slot-machines.com/
slots garden https://411slotmachine.com/
ashbringer relic slots https://www-slotmachines.com/
gladiator slots https://slotmachinegameinfo.com/
dissertation help service binding https://buydissertationhelp.com/
help with data analysis for dissertation https://dissertationwriting-service.com/