So it’s been a while since my last writeup. I guess I could and SHOULD have written some stuff, because I’ve been quite busy on the astro-front this summer. Anyone who’s following my Facebook page, the different Facebook groups I’m a member of, or my Flickr page will see I’ve been quite busy with photography!
Not only have I been taking pics of the sky, but I’ve been branching out a bit learning to use my camera on stuff that isn’t in space for a change! So far, it’s been mostly landscape, cityscape and night photography. I’ve also been dabbling in time lapse photography, which I’ve really been enjoying. As a result, I didn’t want my wonderful Nikon D7000 to be permanently attached to my scope. And I like this camera specifically because the 16 MP sensor in the D7000 has the best low light performance of any other Nikon or Canon crop sensor. So I decided that rather than buying another expensive camera, I would get myself a used Nikon D5100, which shares the same sensor and processor as the D7000. This camera is lighter on features, so it would become my main astro-camera (to be full spectrum modded in the future) while my D7000 would be used to shoot other stuff. And I’ve been getting a lot of use out of both! For the $325 I paid for my D5100, it was a brilliant purchase!
But I digress… And now, onto the real point of this blog entry.
Much like with anything else, you have good and bad days in astrophotography. Sometimes, problems are self-inflicted, and other times they’re beyond our control. Over the past 3 years, I’ve encountered my fair share of issues in the field. Everything from ID-10-T* errors, weather, equipment issues, or a combination thereof. More often than not, is was a combination of 2 or more of those, with my dumb-assery being a an active contributor.
As I got more experienced, the ID-10-T errors decreased significantly. I still have my occasional moments of utter dumb-assery, but for the most part, I’m now fairly well organized and know my gear quite well. I’m basically hauling around a mobile field observatory and set it up and tear it down in the dark without issue. And of course, knowing how to operate it all properly plays a large part in having successful imaging sessions.
Now, that’s not to say I didn’t have any good sessions. I’ve had many where things have gone very well and I got rather nice images. As I progress, my successful images greatly outnumber my unsuccessful ones. But I’ve had very of those days where everything just turned out to be absolutely perfect as if the stars had lined up just for me. This past weekend was such a weekend.
On Friday night, my friend Adam Correia, a brilliant photographer, messaged me asking if I wanted to go out to do some night shooting. The conditions were questionable, but the weather forecast and clear sky charts seemed to say that clear skies would show up around 11 PM. So we headed out to the Foley Mountain Conservation Area in Westport, Ontario. The mountain overlooks this scenic little town on the Rideau Canal and a nice lookout spot offers a clear view of the lake, canal and overall landscape. I’m sure thousands of pictures had been taken from that spot over the years, but we were out to do something different.
My “big project” for the evening was to make a time lapse sequence. I set up my D5100 and its intervalometer and set out out to shooting the horizon. The first 2 sequences of clouds I shot were on a static tripod, but the 3rd sequence I shot using my iOptron SkyTracker with 1/2 speed mode so that the sky and land would move at different rates.
Overall, this project turned into a great success. The motion of the clouds through the sky was dynamic and hypnotic when backed by bright moon light. And finally in the last sequence when the clouds had parted, the Milky Way gracefully swept through the sky over the glow of the town. Mission success!
While my D5100 was running in auto pilot, I had my D7000 on another tripod shooting the landscape and Milky Way. Most of my pics looked great, but I didn’t find many of them terribly appealing, But I did have a few notable ones that turned out quite well.
 |
| Westport, Ontario Flickr link: https://www.flickr.com/photos/crunchmeister/20795744435/in/dateposted-public/ |
 |
| Westport, Ontario Flickr link: https://www.flickr.com/photos/crunchmeister/20769508206/in/dateposted-public/ |
 |
| 6 panel panorama of the Milky Way above Westport, Ontario Flickr link: https://www.flickr.com/photos/crunchmeister/20769508206/in/dateposted-public/ |
And I would be remiss if I didn’t mention Adam’s phenominal image! His images are always astounding, and he got several great ones that night. But this one in particular is absolutely amazing and I would feel I was doing our perfect evening an injustice if I wasn’t going to share it here (with his permission, of course)
 |
| Facebook link: https://www.facebook.com/photo.php?fbid=10156485460790355&set=a.10150289194090355.509692.569505354&type=1&theater |
So the evening turned out perfect. Perfect conditions, no humidity, no bugs, and the scenery and skies were perfect!
On Saturday, I took a solo trip out to the Lennox and Addington Dark Sky Viewing Area in Erinsville, Ontario. I’ve wrote about this place often, and with good reason. I’m a regular user of the site and pretty much all my best deep sky images were taken from there. Whenever the weather is clear and I have nothing more pressing, I’m out there capturing the night sky.
The last couple of times I was out there, I travelled light with only my cameras, tripods and lenses. This time, I decided to haul out my scope again to do some more serious deep sky imaging. I didn’t really have any particular target in mind. I figured I’d pick something once I got there.
Upon arrival, the sky was rather hazy. After setting up, I took some images of the moon with my scope and ZWO ASI120MC-S camera. I didn’t really expect much from them, and was right to assume that. They were ok, but nothing worthwhile publishing. They actually turned out better than I expected, but still not great. Nonetheless, was worthwhile playing with anyway since I haven’t had much opportunity to use this camera since I got it some weeks ago.
Shortly before the moon set completely, the clouds vanished. I removed the ASI120 from the imaging scope, slid it into the guide scope, and attached my Nikon D5100 to the telescope. At this point, I had been pointing out M31 The Andromeda Galaxy to people for several minutes. So I thought it would be fun to try to take some high res images of it with my “big” scope. I have a lot of images of M31, but most taken with my camera with a 300mm lens or 120mm refractor. It was time to step up my game.
Now to backtrack a bit; I had attempted a core shot of M31 last fall before I got my auto guider. Unfortunately, I wasn’t able to do any more than 2 minute exposures without significant star trailing. Even after collecting almost 40 minutes (before clouds moved in), I only had 8 usable shots that made it into the final stack. Overall, the results wasn’t terrible, as can be seen in the photo below, but I REALLY needed a mulligan on this one. I knew I could do much better, especially now that I was armed with an auto guider. I would be able to do longer exposures!
 |
| Flickr link: https://www.flickr.com/photos/crunchmeister/15251305780/in/dateposted-public/ |
So I punched it into my Celestron handset. The scope stopped, and I did a test exposure at max ISO for 5 seconds to check my framing. PERFECT! I couldn’t have asked for a better position or composition! Not only was the core and most of M31 perfectly positioned, but M32 and M110 were both in frame too, something I didn’t manage on my last image. Even at f/6.3, I can’t fit all of M31 into my field of view, but this looked really good. It was time to shoot.
Once I had PHD up and running and guiding properly, I started off with a test exposure of 2 minutes at ISO 1600 to test my tracking. It was spot on, so I upped it to a 5 minute exposure. The resulting image was very nice. The core was slightly blown out, but the details in the spiral arms and dust lanes was quite stunning. So I figured I’d do a 10 minute exposure to see how that turned out. I had never done an exposure longer than 5 minutes before, so I was curious. And since the tracking was so perfect, I wanted to see how it held out.
Well, I was NOT disappointed. As soon as it appeared on the screen, I was utterly speechless (a rarity for me). The fine details popped out. The outer edges of the galaxy were well defined. And I could see the nebulous dust clouds surrounding the galaxy. And most importantly, the focus was dead on and stars were perfect pinpoints. I was impressed! The core was utterly blown out, but that’s to be expected. It was the fine outer detail I was after. I knew I would have to do multiple exposure lengths to get the different parts of the galaxy balanced out without blowing out the core and its surrounding regions anyway.
So I entered a shooting plan into Backyard Nikon as follows:
10 x 1 minute exposures for the central part of the core
15 x 2 minute exposures for the inner dust lanes surrounding the core
12 x 5 minute exposures for the arms and main dust lanes
4 x 10 minute exposures for the outer part of the arms and nebulosity
At the end of the session, I shot a series of dark frames matching the exposure lengths for stacking.
Out of 2H 20M of data, 1H 54M turned out to be high scoring and had pinpoint stars. I lost one of my 10 minute exposures which had some trailing, but overall, I had plenty of great data, and I couldn’t wait to stack it the following day.
And this is the result. I did a multi-group stack in DeepSkyStacker. The resulting image was just mind-blowing. Even without making any adjustments, the image on my screen was orders of magnitude better than anything I’d ever captured before. And I was actually seeing the rusty colour of the dust lanes, the yellowish glow from the core, and the blueish haze in the spiral arms. This was unlike anything I had done before.
So I exported the image into Photoshop and started playing with it. After several post-processing attempts that didn’t look right, I realized that the data I had was so good that I didn’t really need to do much histogram stretching at all. I had been going too hard on all my adjustments. So I started over again, this time skipping most of the steps in my normal DSO post-processing workflow and being far more subtle in the rest of my adjustments. I did some contrast enhancement, a bit of localized sharpening, light colour enhancement, and finally some noise reduction. I did very little to this image compared to my usual post-processing techniques. And this is the final version, which I’m absolutely ecstatic over! I think this will be my defining image for 2015.
 |
| Flickr link: https://www.flickr.com/photos/crunchmeister/20829379825/in/datetaken/ |
Now while my scope was busy capturing M31, I was busy shooting the sky with my D7000, I popped on my Vivitar 13mm f/2.8 lens and started shooting the Milky Way. We’re definitely past prime time on the Milky Way, but it’s still a wonderful sight. Several of my pics turned out great, but were rather plain and generic looking. So I decided I’d try something totally different.
Levering the flexibility of my new Manfrotto 055 Pro tripod (highly recommended to me by Adam), I set it up so that the camera was basically 4″ off the ground. I got near the ancient, 2 billion year old stones that surround the concrete pad at the Dark Sky Viewing Area, and snapped off a pic of the Milky Way that showed much more foreground than I normally get when I’m there. And I have to say, the resulting image was quite impressive!
 |
| Flickr link: https://www.flickr.com/photos/crunchmeister/20634713338/in/dateposted-public/ |
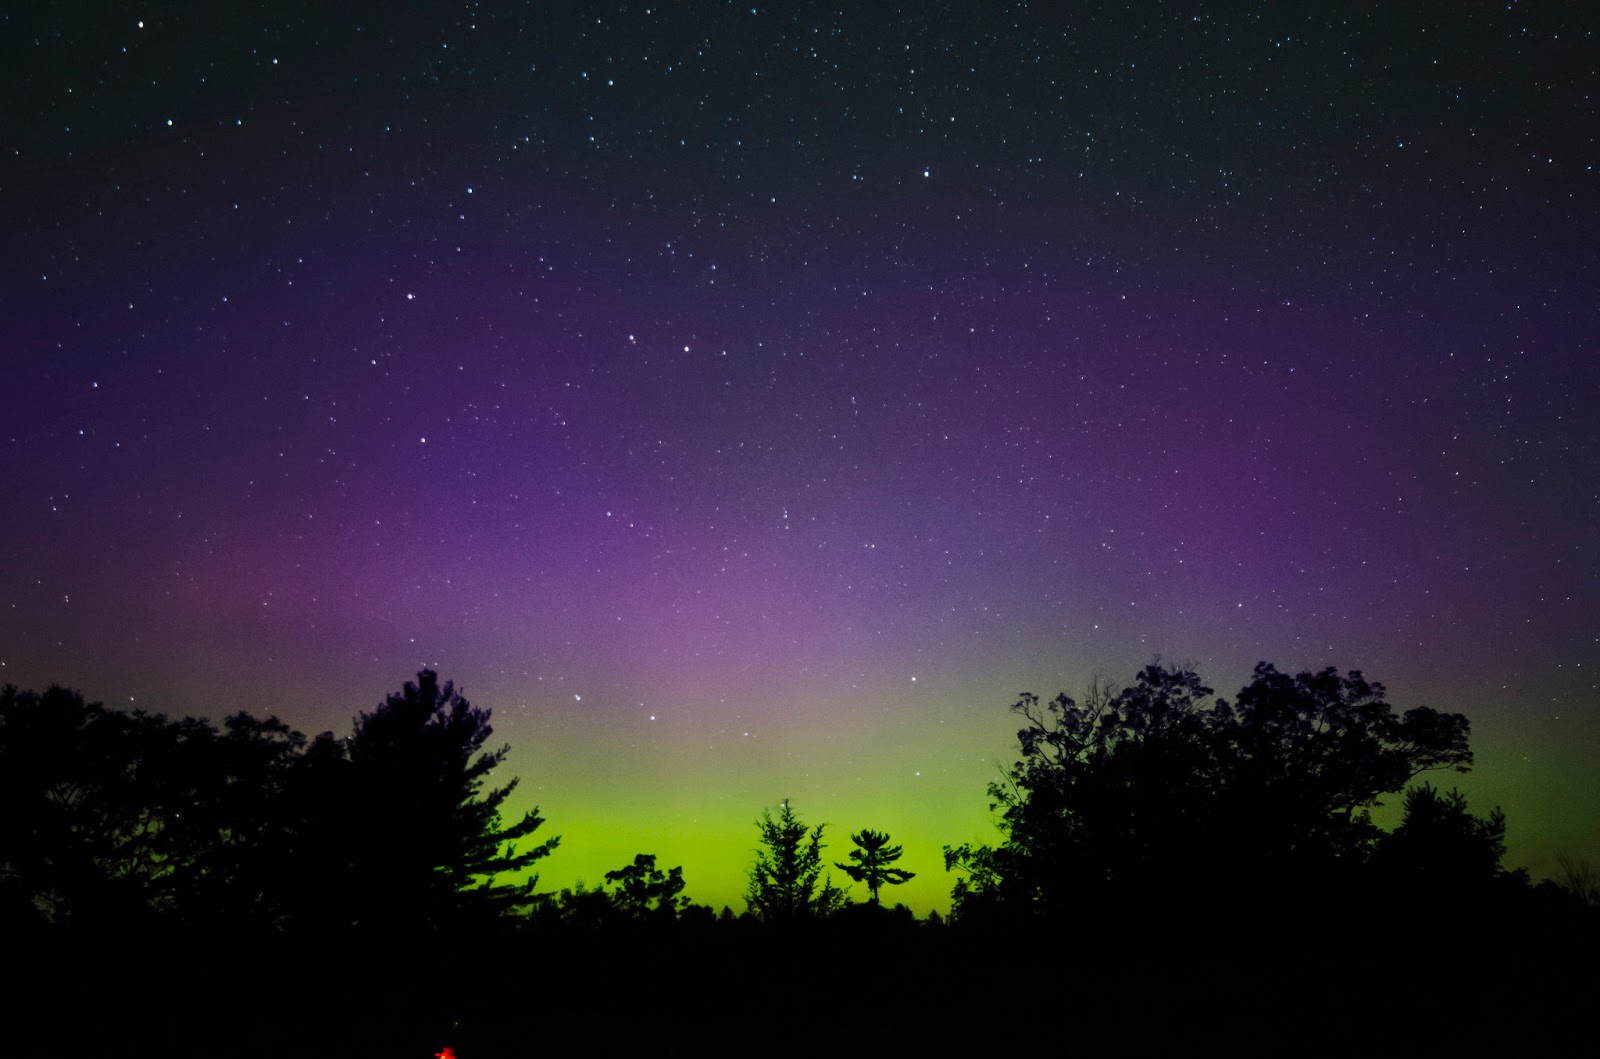
But the REAL surprise that night was an unexpected showing of the Aurora Borealis! I had captured a bit of aurora the previous week when it was at a Kp 5.6 level, which is pretty much the minimum for it to normally be visible from my area. It was cool to capture some aurora, but it wasn’t a very memorable display by any means. The image wasn’t bad at all, especially considering the low index.
 |
| Flickr link: https://www.flickr.com/photos/crunchmeister/20009659203/in/datetaken/ |
What really surprised me about this time was that I had been keeping an eye on the aurora forecast. It hadn’t broken a Kp 4 all day, and was at a Kp 3.6. But there was the aurora dancing away on the horizon even brighter than the previous week. I took a test exposure to ensure it was indeed the aurora, and it indeed was. So I quickly set up my intervalometer and shot a series of images that I put together into this time lapse.
It turned out to be a spectacular display of the likes that I hadn’t seen in years. And I finally managed to capture my first good time lapse of it!
So all in all. I would say this was about as perfect a weekend of photography as I could get. Many great shots and one evening spent with a good friend I don’t get to see very often. One can’t ask for much better than that!
So until next time, clear skies, and keep looking up!
* ID-10-T Error: (pronounced I DEE ten TEE) is a computer tech inside joke meaning IDIOT, referring to the error being caused by the user, not a hardware or software problem.
3meanwhile
gay chat roulette https://bjsgaychatroom.info/
gay dating sites that work on windows free https://gaypridee.com/
totally free gay phone chat https://gaytgpost.com/
men 4 you gay chat https://gay-buddies.com/
dating gay https://speedgaydate.com/
best way to win at slots https://2-free-slots.com/
dnd spell slots https://freeonlneslotmachine.com/
double down free slots https://candylandslotmachine.com/
caesars slots https://pennyslotmachines.org/
wms free online slots https://slotmachinesworld.com/
fortnite weapon slots https://slotmachinesforum.net/
download scatter slots https://slot-machine-sale.com/
texas tea slots for fun https://beat-slot-machines.com/
egg poacher – 3 slots https://download-slot-machines.com/
quick hit slots free coins https://411slotmachine.com/
wind creek online slots https://www-slotmachines.com/
penny slots free https://slotmachinegameinfo.com/
writing a rationale for dissertation https://buydissertationhelp.com/
dissertation proposal https://dissertationwriting-service.com/
writing an abstract for a dissertation https://help-with-dissertations.com/